As rendering tools evolve, so do the possibilities for design. With the release of v4.0, mnml.ai brings a more refined, realism-focused engine to the table—while v3.1 remains a favorite for fast, creative exploration. This guide compares both engines using real scenarios, showing where each version shines and how they fit into different stages of the design process.
To help you choose between the two engines, we compared v3.1 and v4.0 across five key features that matter most in your design workflow: prompt structure, night shot rendering, edit mode tools, creative rendering flexibility, and overall visual quality. Here’s how they perform side by side and where each version fits best.

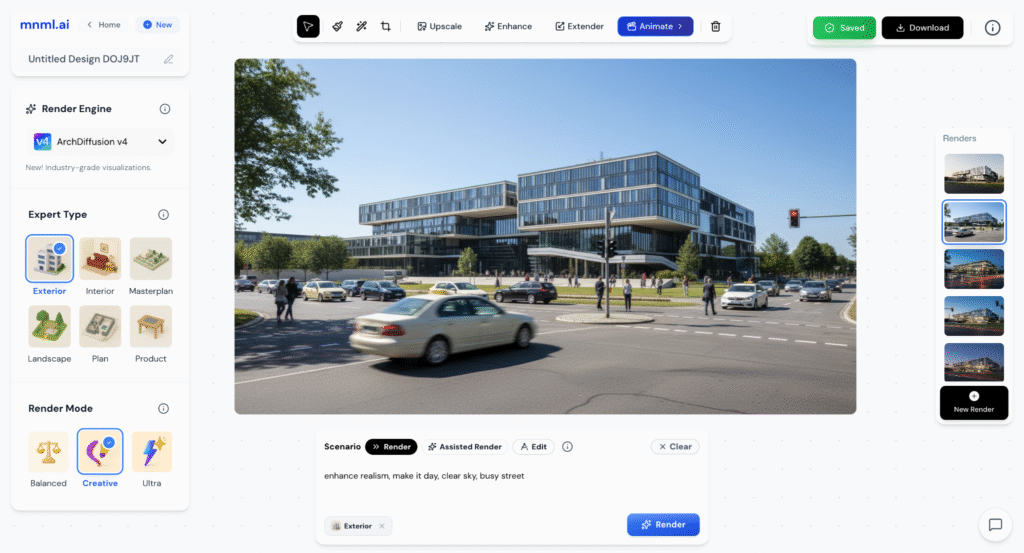
Prompt Structure
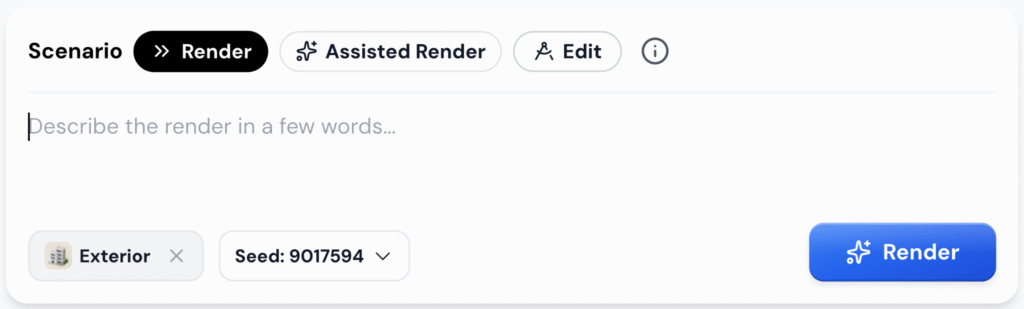
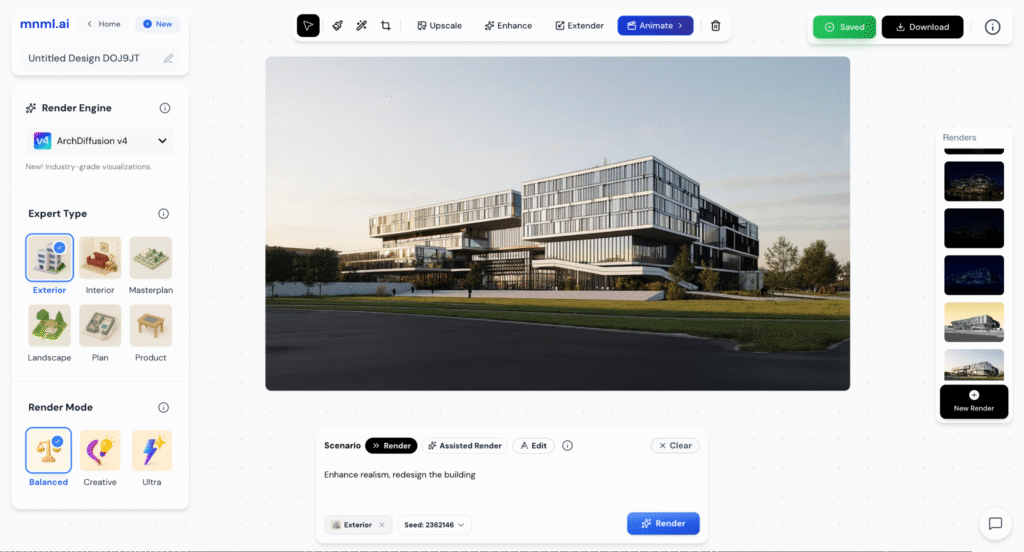
In v4.0, prompt handling is more advanced. You can choose from three clear Render Scenarios:
- Render for direct prompts
- Assisted Render for AI-enhanced descriptions
- Edit for localized changes like “add people” or “make it night”
This setup makes it easier to control how your design is interpreted without rewriting everything manually.
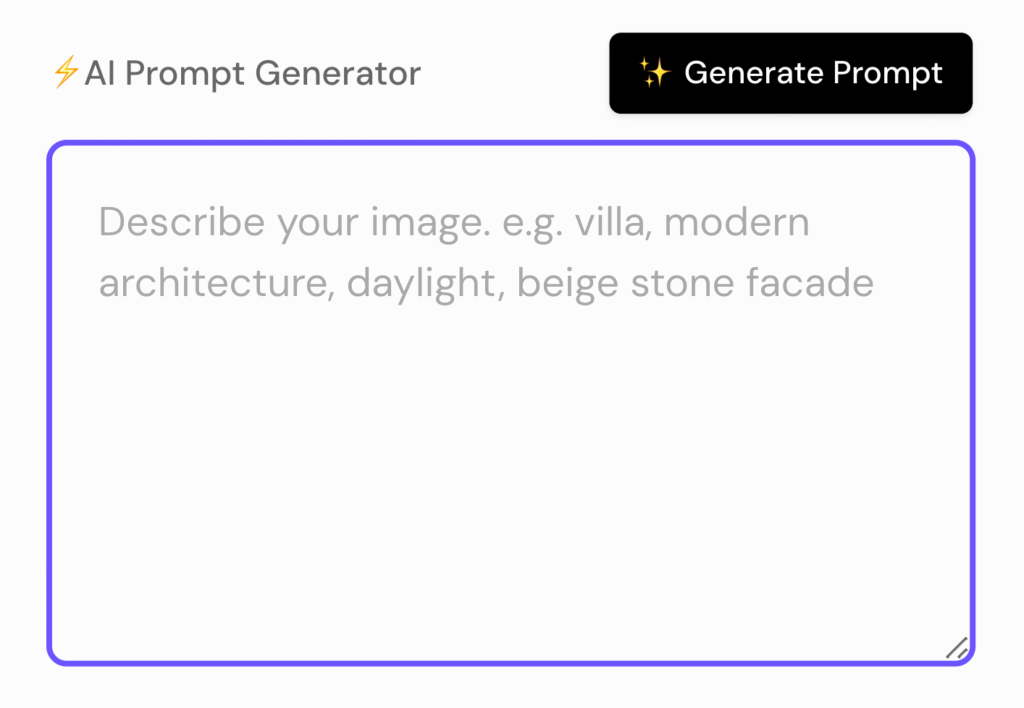
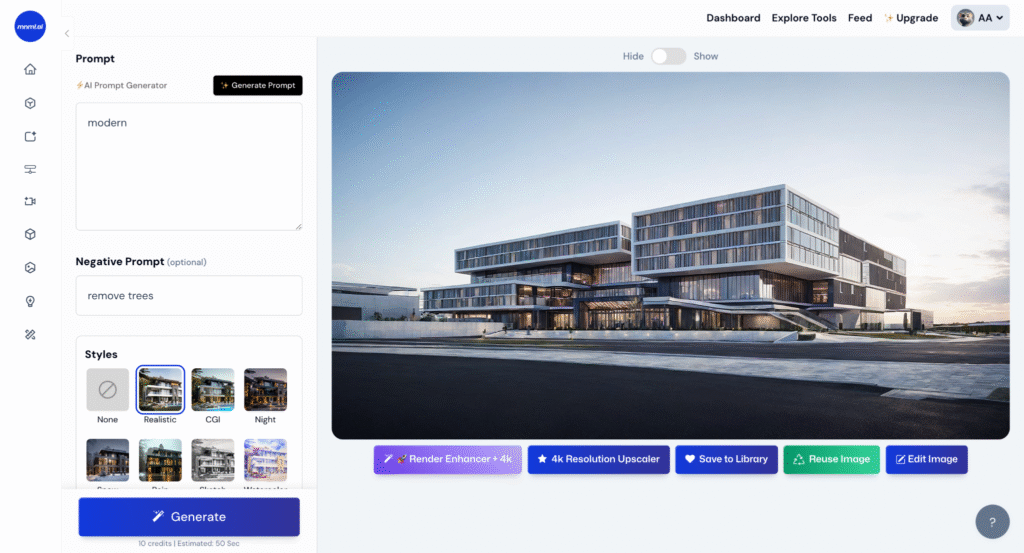
In v3.1, you rely on the AI Prompt Generator to help craft a starting description, or you can manually type your own prompt from scratch. While flexible, it often requires multiple tries to get the style, lighting, or mood just right—especially for users who aren’t familiar with prompt writing.
Takeaway: v4.0 simplifies the process and gives you more flexibility with less effort. Whether you want full control or guided help, it adapts to your workflow.
Post-Processing Options
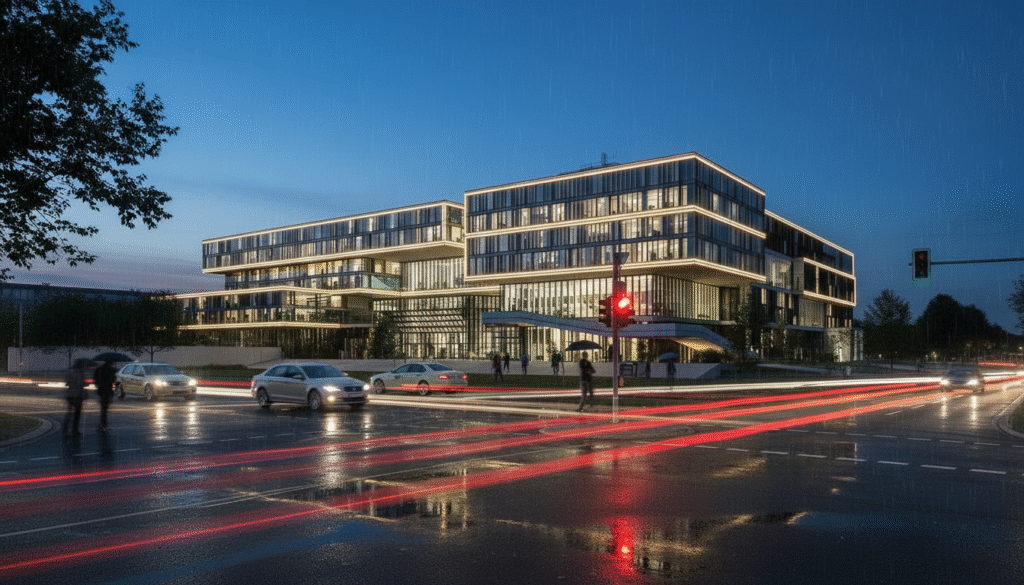
1. Night shot
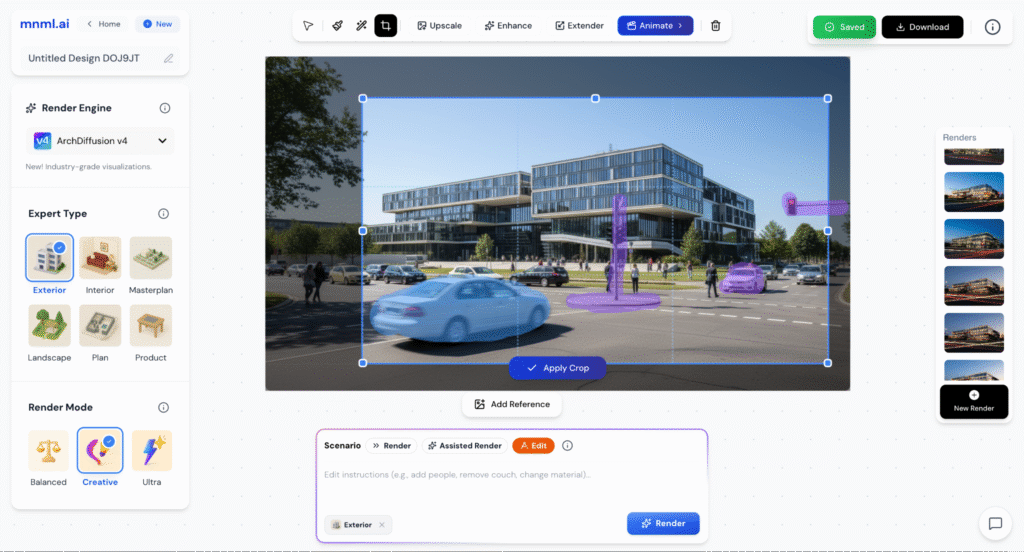
Creating a night scene works differently between the two versions. In v4.0, the process is more manual but also more powerful. To create a night render, you switch to Edit mode, set the Render Mode to Creative, and type a direct instruction like “make it night, add wet roads, lights on, and rain reflections.” This gives you much more control over the final look.
In v3.1, you simply select “Night” from the Style options or include it in your prompt. It’s quick and easy, making it accessible for users who want fast results without tweaking settings.
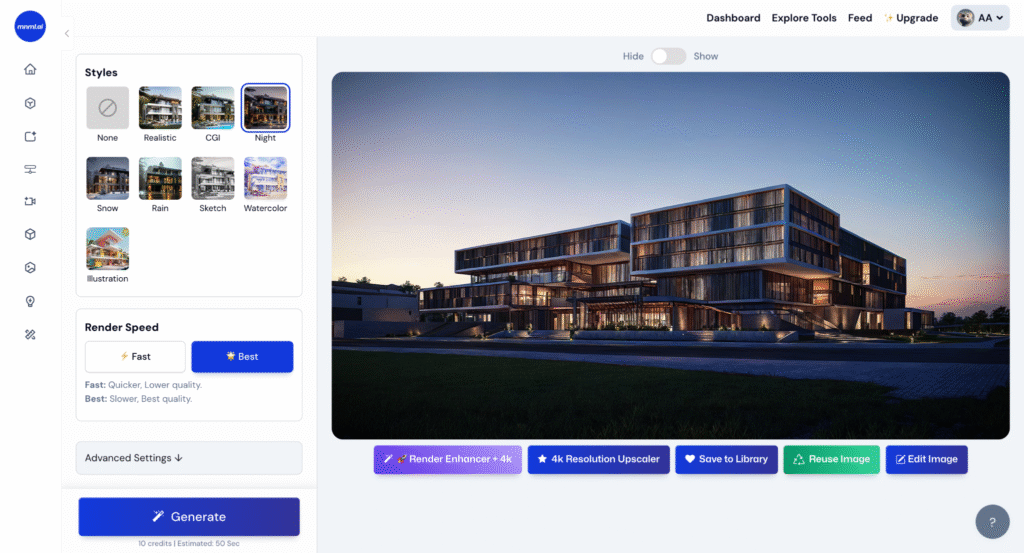
Takeaway: v3.1 is faster and easier for quick night scenes, but v4.0 delivers more realistic and atmospheric results—especially when you want to add context, lighting effects, or weather conditions.
2. Edit mode
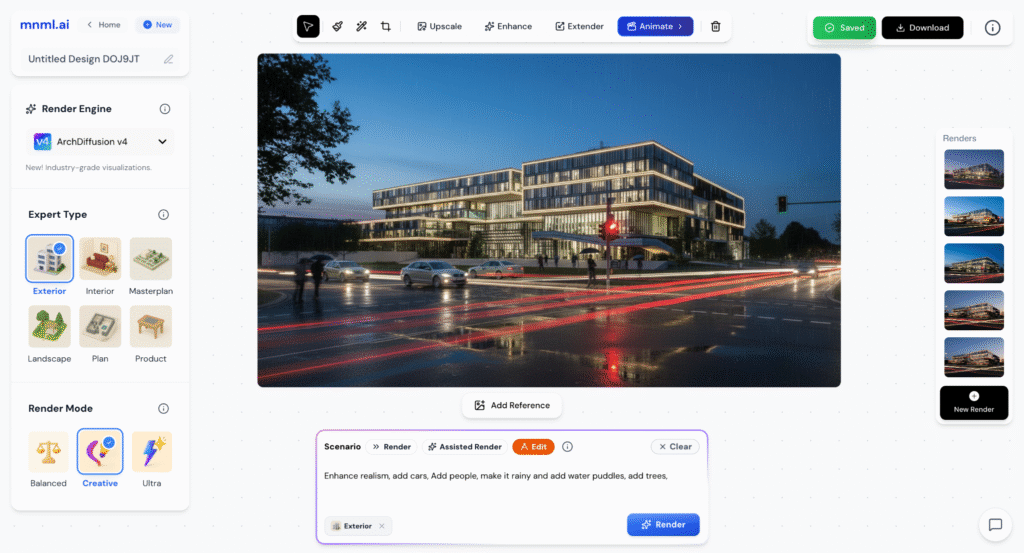
In v4.0, a full Edit Mode is available. You can mask specific areas, use an AI eraser to remove objects, crop the frame, extend the image beyond its original borders, or even create short animations. Edits are visual and direct, giving you more precision when refining the render.
In v3.1, there is no dedicated edit mode. The only way to remove elements is through a negative prompt, which often delivers mixed results and offers no visual control over what gets removed or changed.
Takeaway: v4.0 introduces powerful image editing tools that give you control after rendering—without needing to go back to your 3D model, while v3.1while offers limited editing with no visual feedback.
Creative Render
In v4.0, geometry stays closely tied to your input model. While you can describe changes through prompts, the engine is more focused on preserving architectural realism. This makes it less flexible for dramatic redesigns or stylistic overhauls.
When it comes to reimagining or redesigning a building, v3.1 offers more freedom. It’s better at reshaping geometry, allowing you to completely transform the structure with just a prompt. Whether you’re testing out bold styles or generating a concept in the spirit of a specific architect, v3.1 handles abstract and expressive ideas well.
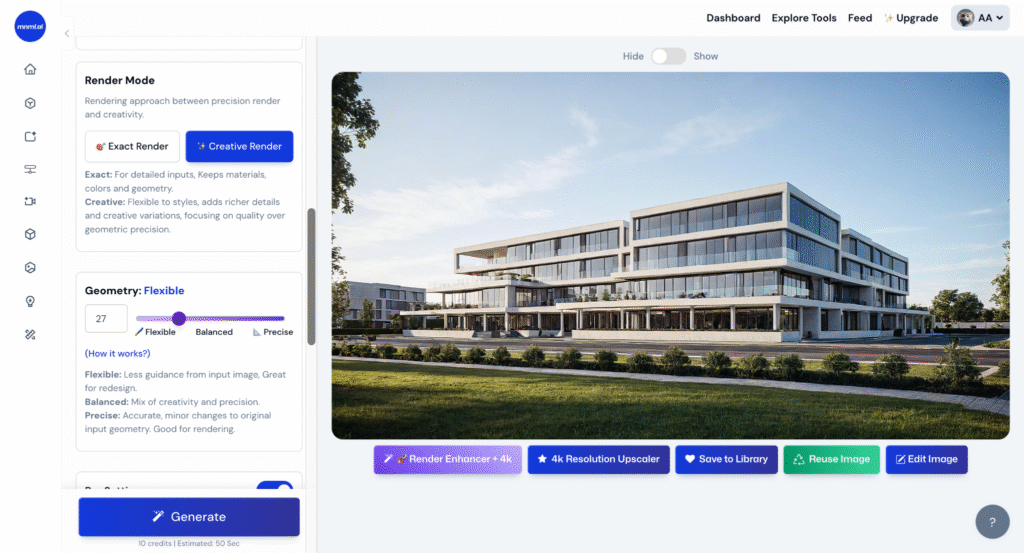
Takeaway: v4.0 excels at faithful visualization and material realism based on your original model, while v3.1 is ideal for creative exploration and conceptual redesign.
Overall Quality: Realism and Presentation Value
When it comes to image quality, v4.0 is a clear step up. The renders feel more grounded, with better handling of materials, light, and spatial depth. Glass reflects accurately, shadows fall more naturally, and colors are more balanced. It produces visuals that are presentation-ready with minimal adjustment.
v3.1, while still strong, tends to flatten the image. Reflections, materials, and lighting are less refined, and renders sometimes feel stylized rather than realistic. It’s effective for fast concept studies but lacks the polish needed for final presentations.

Takeaway: v4.0 delivers industry-grade visual quality, especially when realism and consistency matter. v3.1 is better suited for early design thinking, but v4.0 takes the lead for final visuals.
Conclusion
v4.0 and v3.1 serve different but complementary roles in the design process. v4.0 is built for clarity and realism, making it the better choice for refined presentations and client-ready visuals. With features like assisted rendering, edit mode, and smarter material handling, v4.0 offers more control and consistency. In contrast, v3.1 is ideal for early-phase exploration, where speed and creative freedom matter most—it allows you to experiment with form, style, and geometry without needing perfect inputs. If you’re looking to move fast and explore ideas, v3.1 still holds strong. But for visual polish, precision, and an overall smoother workflow, v4.0 is the next step forward.