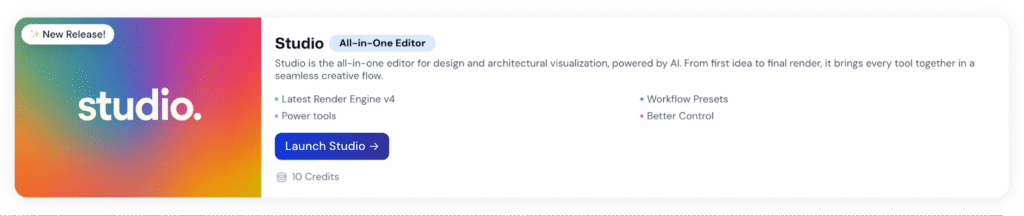
Welcome to Studio Ai — your all-in-one editor for architectural visualization and design.
Whether you’re an architect, interior designer, student, or creative professional, Studio makes it easy to bring your visual ideas to life. Simply upload your image, choose the right expert type, select how you want the image processed, and apply a style. With powerful AI rendering at your fingertips, Studio streamlines your workflow and turns imagination into impact — no steep learning curve required.
Step 1: Choose your starting point
When you click Launch Studio, you’ll land on a clean and simple launchpad for creativity:
- Choose Your Starting Point
Blank Canvas → Start from scratch if you want full creative freedom.
Use Workflows → Follow a ready-made workflow created by mnml.ai team if you’d like guided steps.
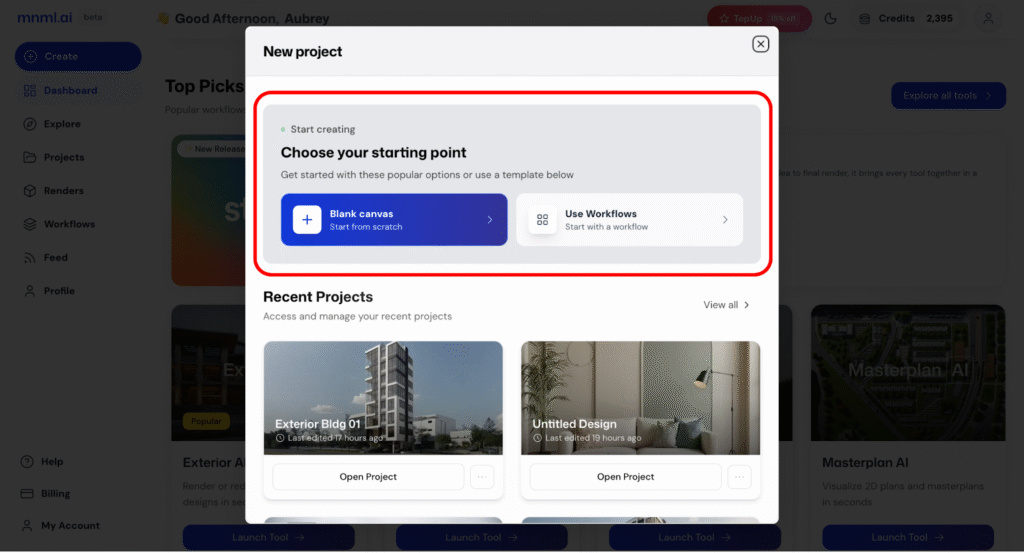
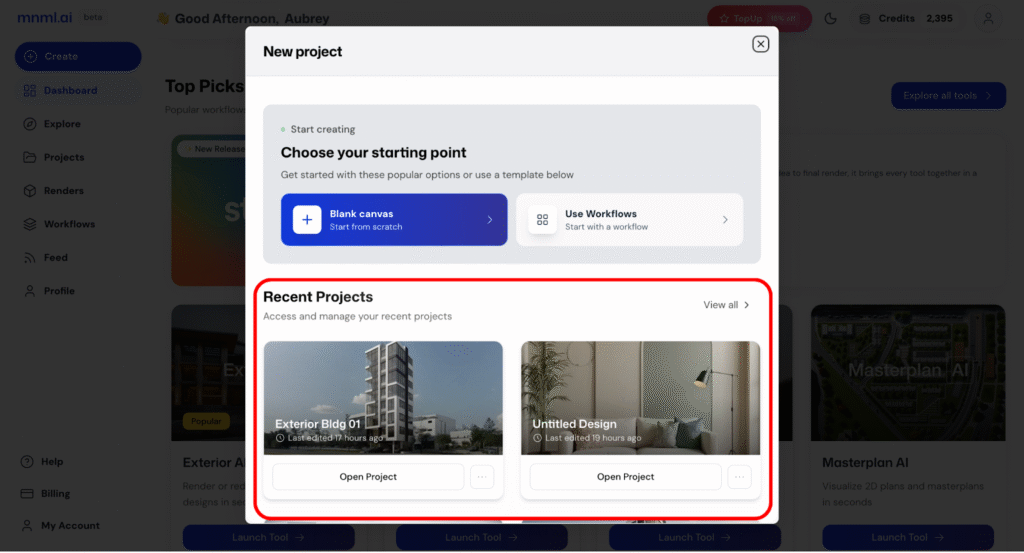
2. Recent Projects
Your Recent Projects appear right below, so you can jump back in without hunting around.
3. Browse Workflows
Explore ready-made workflows to spark ideas and streamline your process.
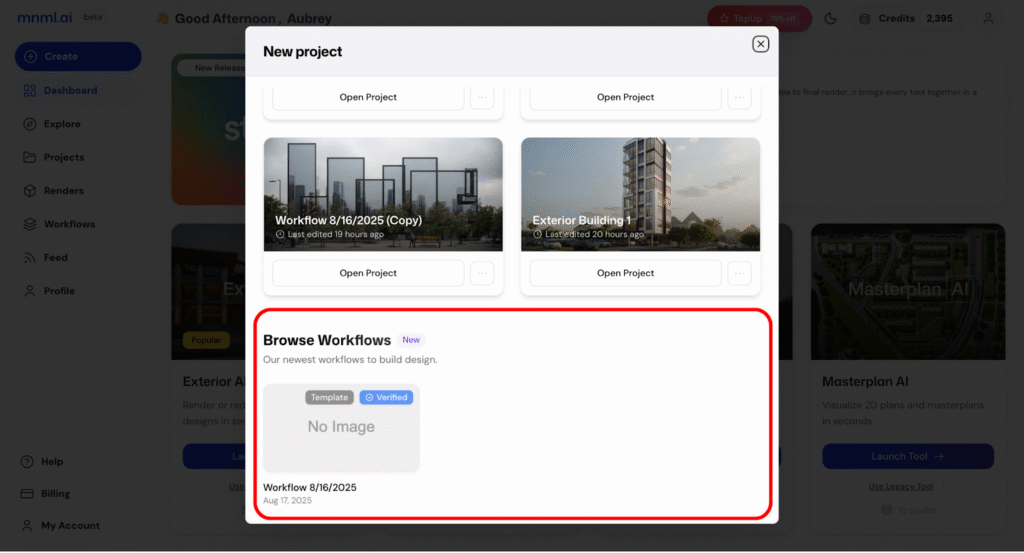
Whether you’re starting fresh or continuing yesterday’s idea, this space makes project creation effortless.
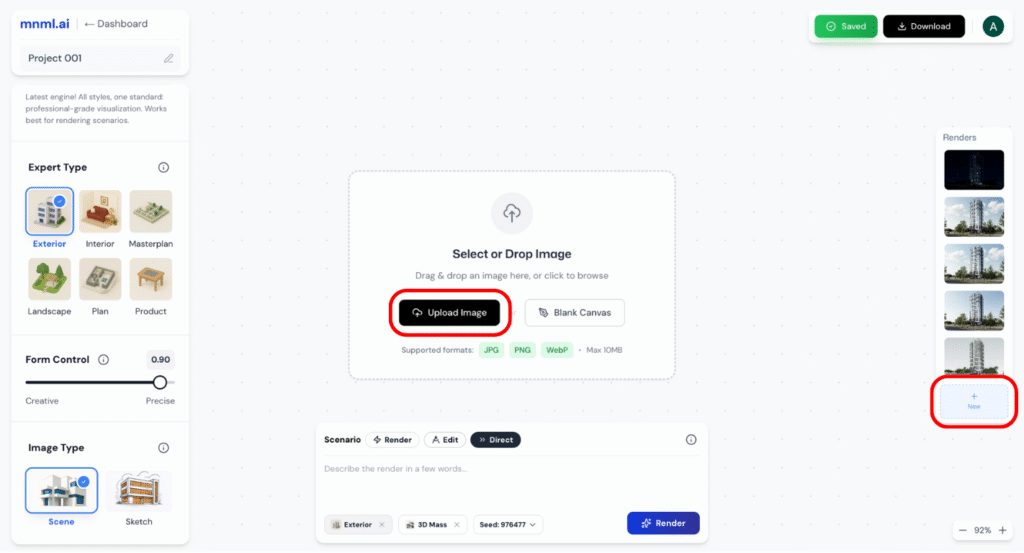
Step 2: Upload Your Image
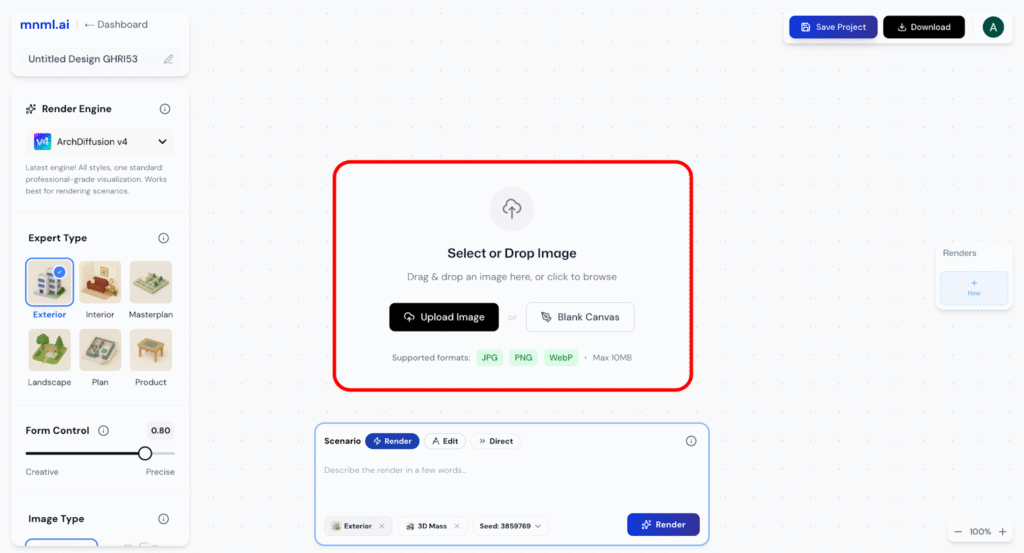
What You Can Upload:
- Snapshots of real buildings or sites
- Screenshots of your 3D models or massing studies
- Hand sketches or digital drawings
File Rules:
- Max size: 10MB
- Formats: .jpg, .png, .webp
Pro Tips:
- Go for clear, centered, and well-lit images
- Skip the tilted shots, UI overlays, blurry pics, or watermarks
Rename your project:
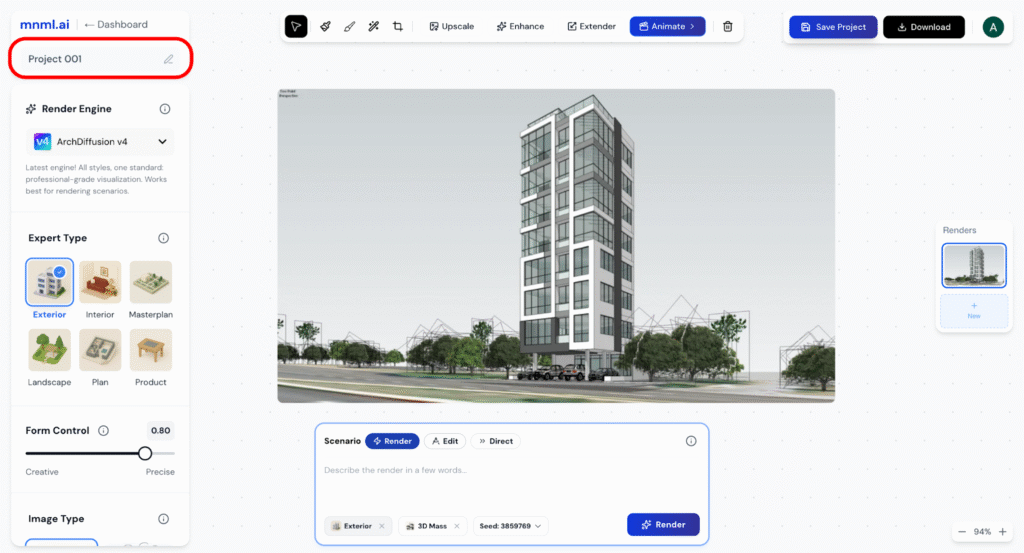
You may now enter a project name to save and organize your work.
Step 3: Render Engine Selection

Studio Ai allows you to choose between different render engines for optimal output quality:
1. ArchDiffusion v4 — Precision Meets Control
Our most advanced rendering engine to date, ArchDiffusion v4 is designed for professionals who need high-fidelity architectural visuals with precise control over design intent.
Key strengths:
- Instruction-aware: v4 excels at understanding and executing direct user instructions within prompts. For example, you can specify, “add two people near the entrance” or “remove the car on the left,” and the engine will interpret these local edits with impressive accuracy.
- Iterative design-ready: It’s built for step-by-step refinement. Whether you’re tweaking a facade, modifying landscaping, or adjusting interior layouts, v4 responds intelligently to incremental changes.
- Detail-rich outputs: From material textures to lighting accuracy, v4 delivers photorealistic results that are ideal for final presentations, client reviews, and marketing visuals.
Use v4 when you need precision, local edits, and tight control over design elements.
2. ArchDiffusion v3 — Creative Exploration, Fast Execution
Tried, tested, and loved by millions, ArchDiffusion v3 remains a favorite for its speed, stylistic flair, and versatility in early-stage design workflows.
Key strengths:
- Creative and expressive: v3 shines in generating stylistic variations and redesign concepts. It’s great for exploring different materials, massing options, or aesthetic directions.
- Fast rendering: With quicker output times, it’s ideal for rapid ideation—especially when comparing multiple design directions.
- Style-strong interpretation: v3 picks up on mood, tone, and atmosphere in your prompt, making it perfect for crafting a distinctive visual identity for your project.
Use v3 when you want speed, creative diversity, or design alternatives during concept development.
Select your preferred engine before rendering for tailored results.
Step 4: Select Expert Type
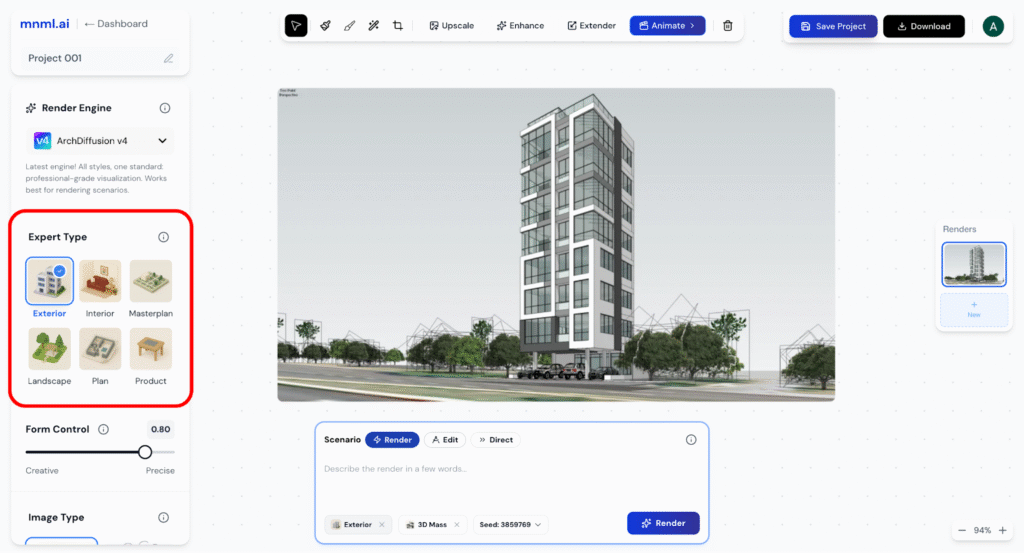
Choose an expert type that aligns with your design needs. Options may include:
- Exterior
- Optimized for architectural facades, buildings, and outdoor views.
- Great for concept development, massing studies, and façade visualization.
- Interior
- Tailors the output for indoor environments—living rooms, kitchens, offices, etc.
- AI focuses on furniture, lighting, materiality, and spatial layout.
- Masterplan
- Ideal for urban design, campus planning, and large-scale layouts.
- Supports diagrams, aerials, and zoning visuals.
- Landscape
- Suited for gardens, parks, and site design.
- AI prioritizes greenery, terrain, paths, and site context.
- Plan
- Focuses on 2D and 3D floorplans and spatial arrangements.
- Works well for architectural drawings and schematic layouts.
- Product
- For product design studio rendering, think of furniture, fixtures, or standalone objects.
- Applies detail and lighting specific to industrial and product design.
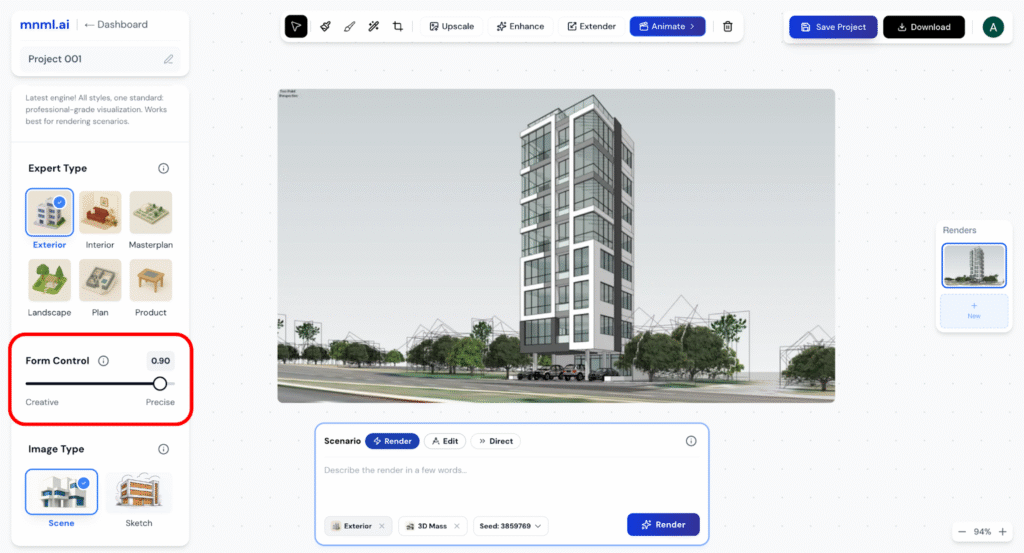
Step 5: Adjust Form Control
Form Control manages how strictly Studio AI follows your input.
Lower values (0.4–0.6) → Encourage more creative reinterpretation. Great for exploring new variations or generating fresh ideas from looser prompts.
Higher values (0.8–1.0) → Produce more precise and controlled forms. Ideal when you want accurate geometry and closer alignment with your input.
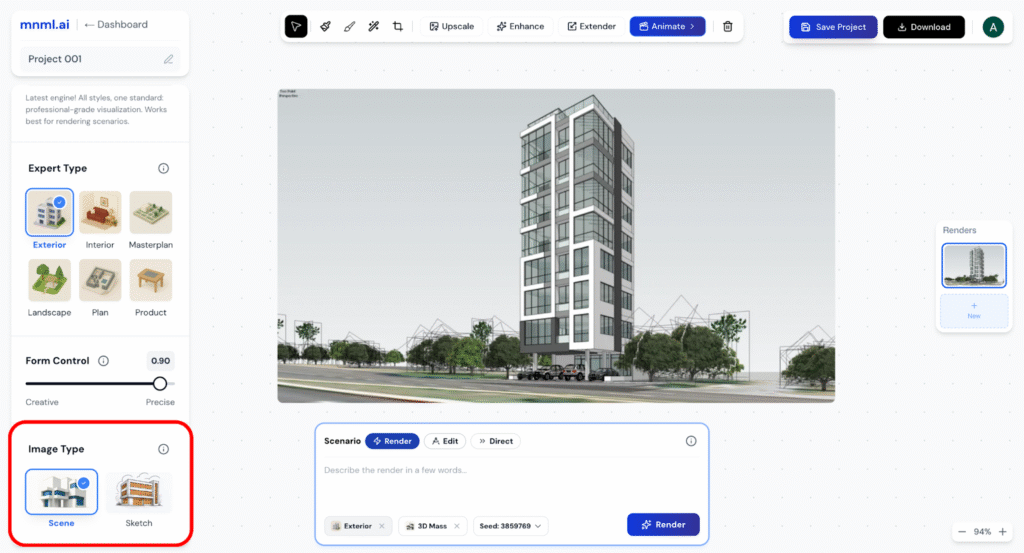
Step 6: Select Image Type
Next, define the image type based on what you’re trying to create:
Choose the type of input image you’re working with.
- Options might include 3D mass/scene, or sketch.
- Each type affects how the render engine interprets and visualizes your input.
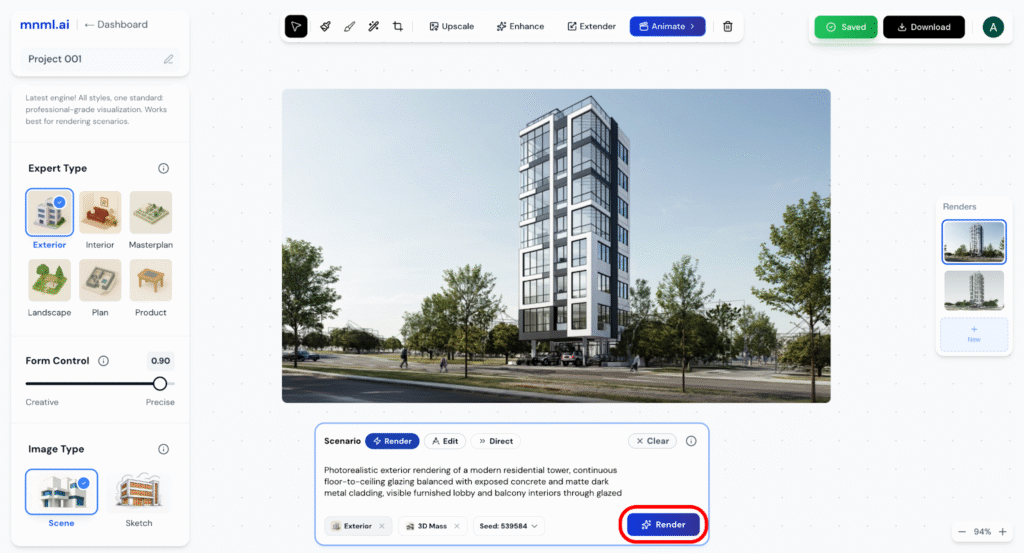
Step 7: Prompt Section
The normal prompt section to write your instructions, but for v4, we have additional option called prompt mode.
The prompt mode is all about how your prompt is being processed in the best way possible for the model to understand your instructions.
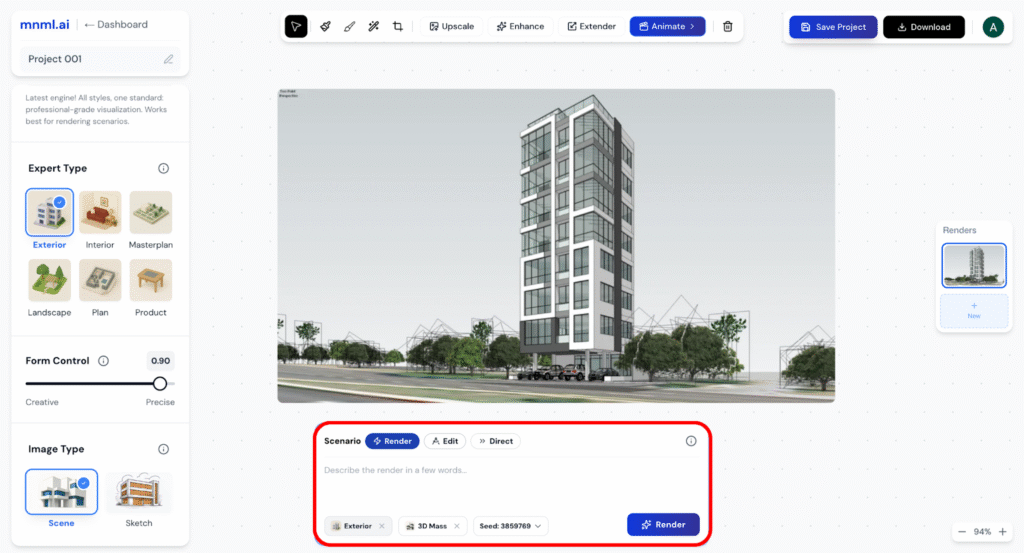
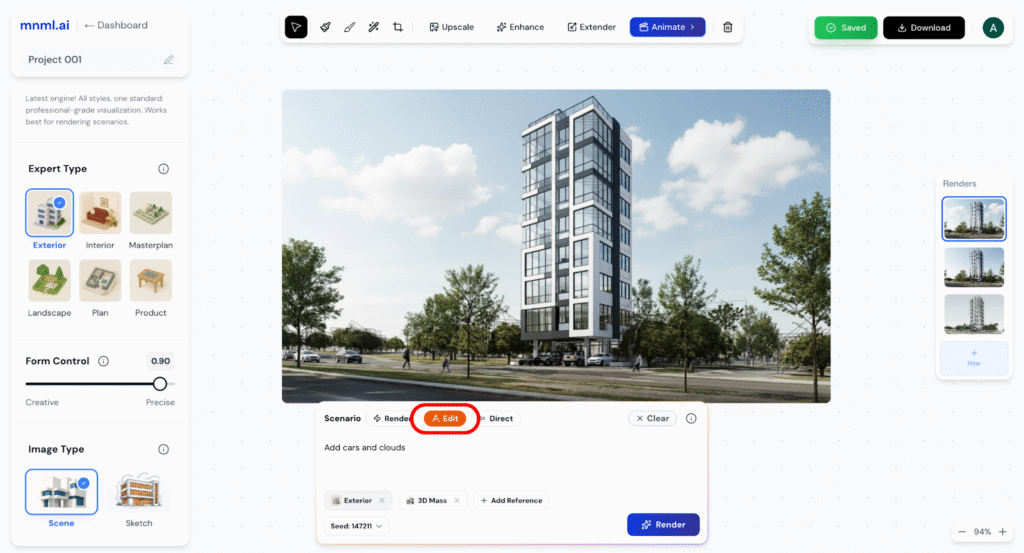
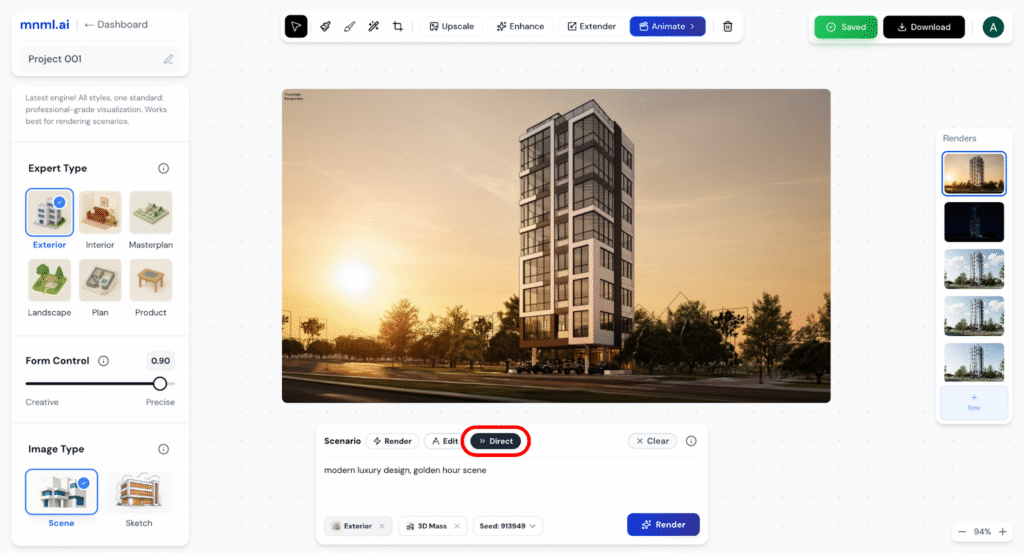
Prompt Mode Options (Scenario):
Choose how Studio AI should handle your prompt:
Render → Standard workflow. The AI automatically enhances your prompt, making it more descriptive for rich, detailed renders.
Edit → Best for localized or partial edits. Use direct instructions (e.g., “add people”, “remove couch”) to modify specific elements within the image.
Direct → Passes your prompt exactly as written, without enhancement. Ideal for advanced users who want full control over the output.
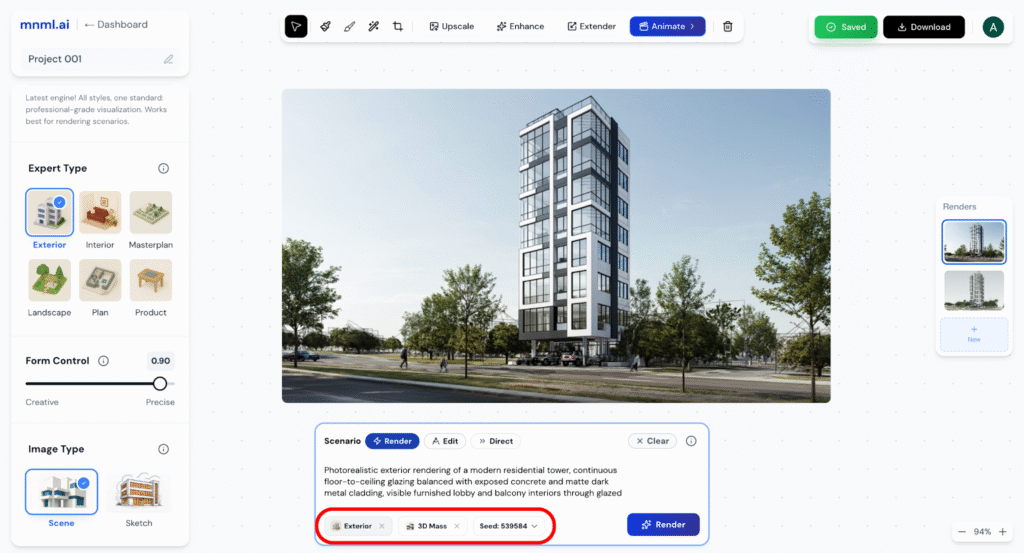
Tags (Below Prompt):
The tags below the prompt box show your current settings: Expert Type, Image Type, and Seed Number. The seed controls randomization — keeping it fixed ensures consistency, while changing it creates new variations.
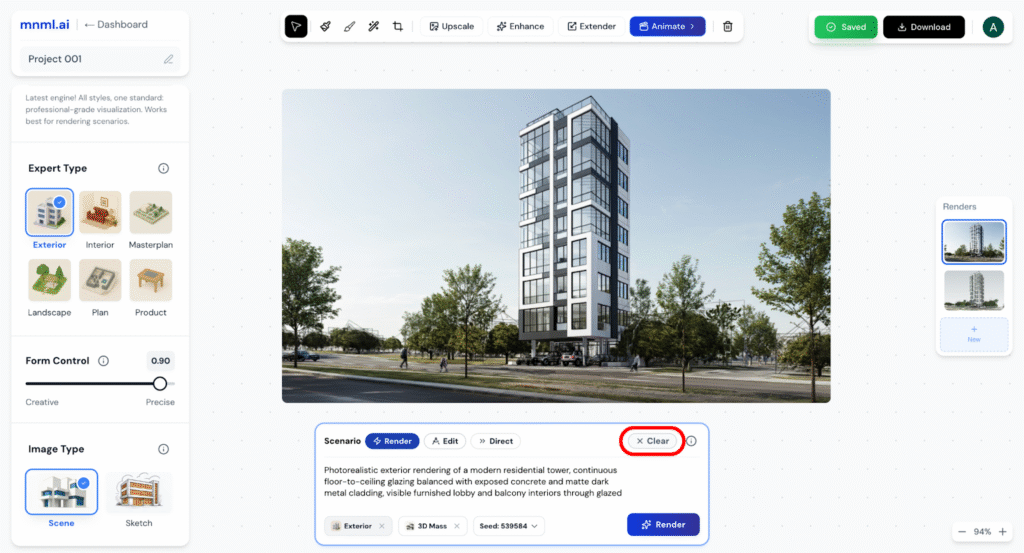
Action Buttons:
Clear: Removes the current prompt and tags.
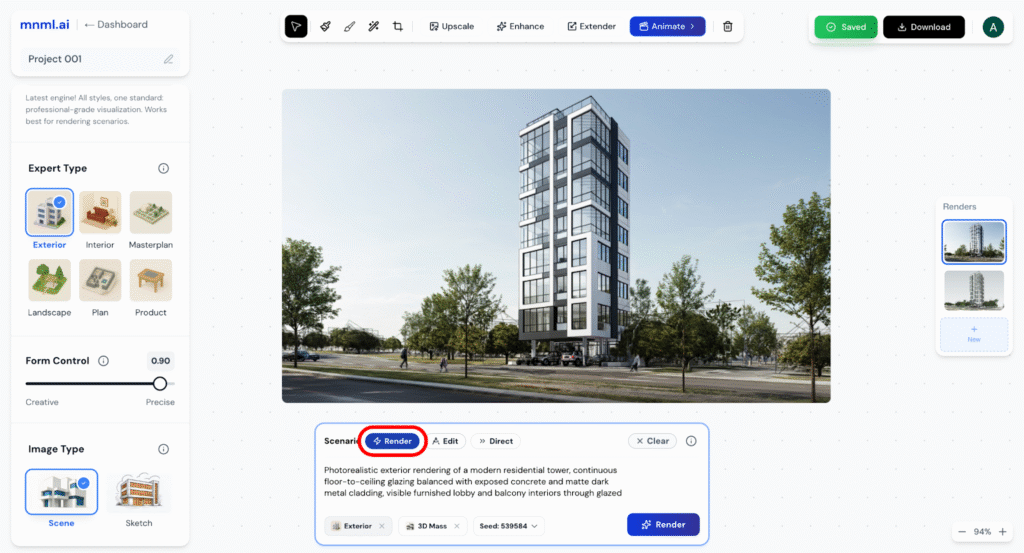
Render (blue button): Submits the prompt to generate the image using the selected settings.
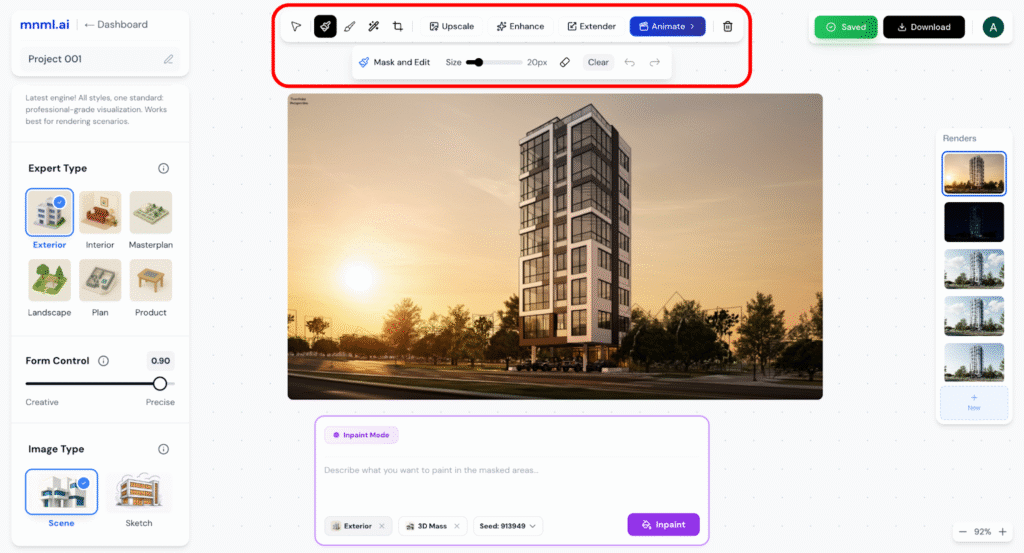
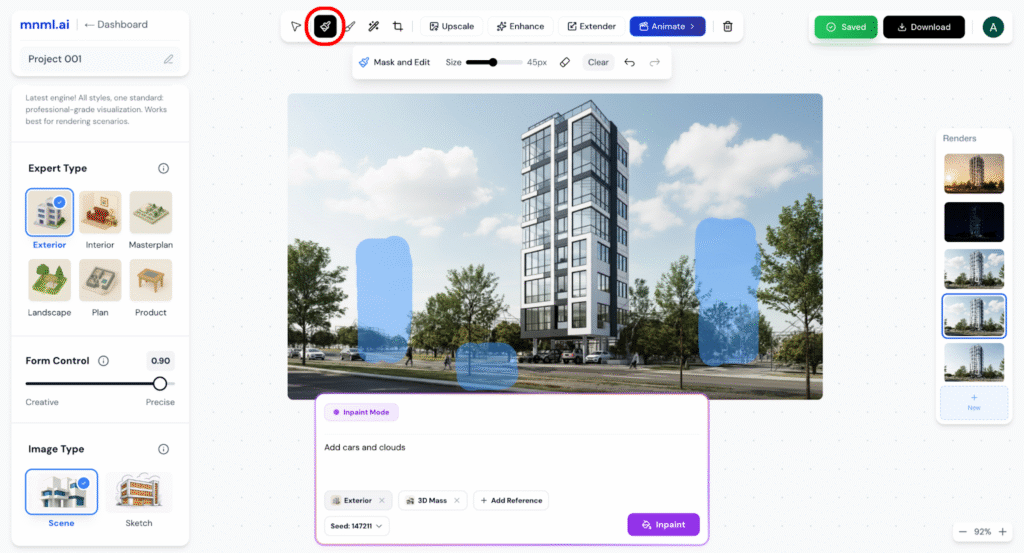
Step 8: Image Editing Tools
After generating your image, Studio Ai provides a comprehensive suite of editing tools:
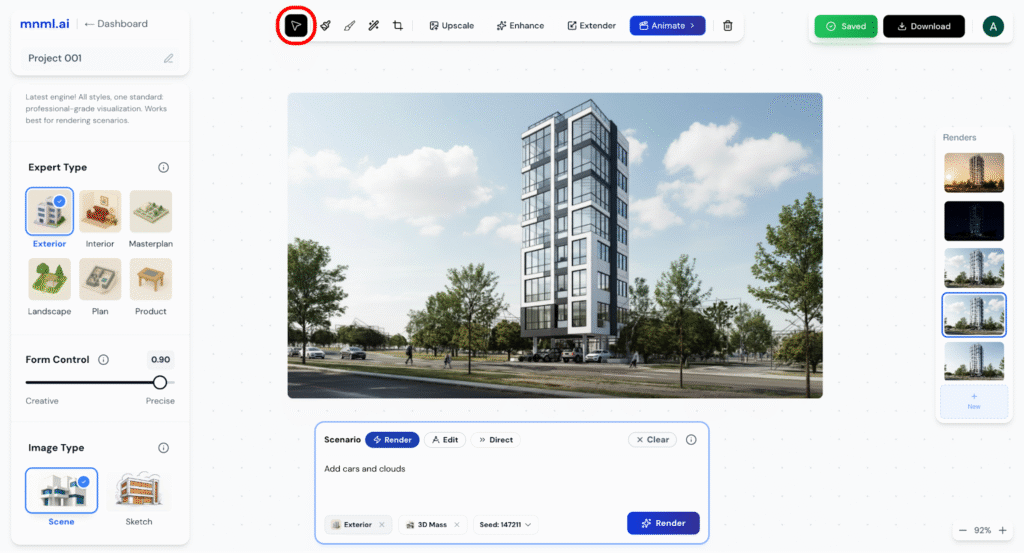
Select: Move, resize, or rotate image elements.
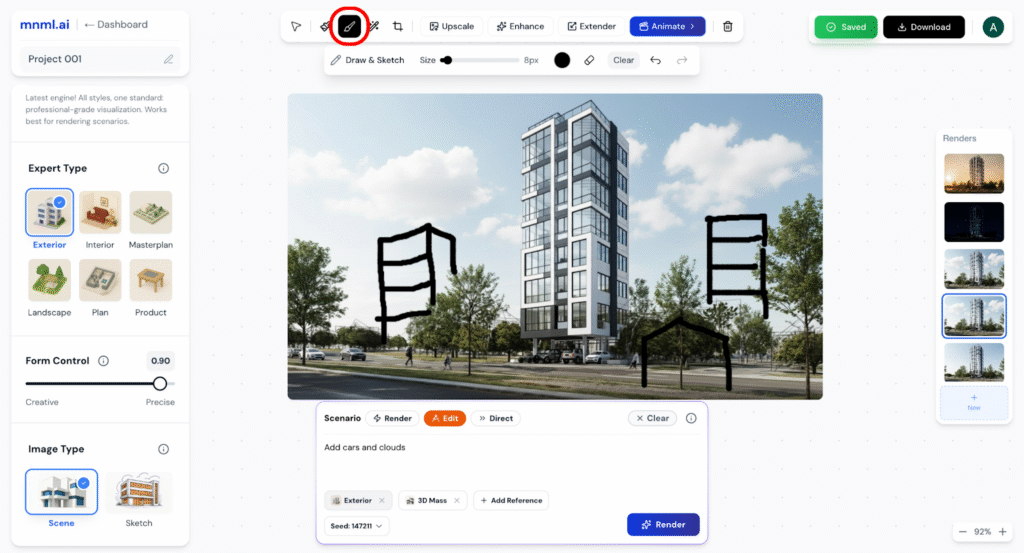
Mask and Edit: Target specific areas for custom adjustments or re-generation by applying a mask. Use the mask to indicate the elements you wish to remove or edit.
Draw: Add freehand marks, sketches, or annotations.
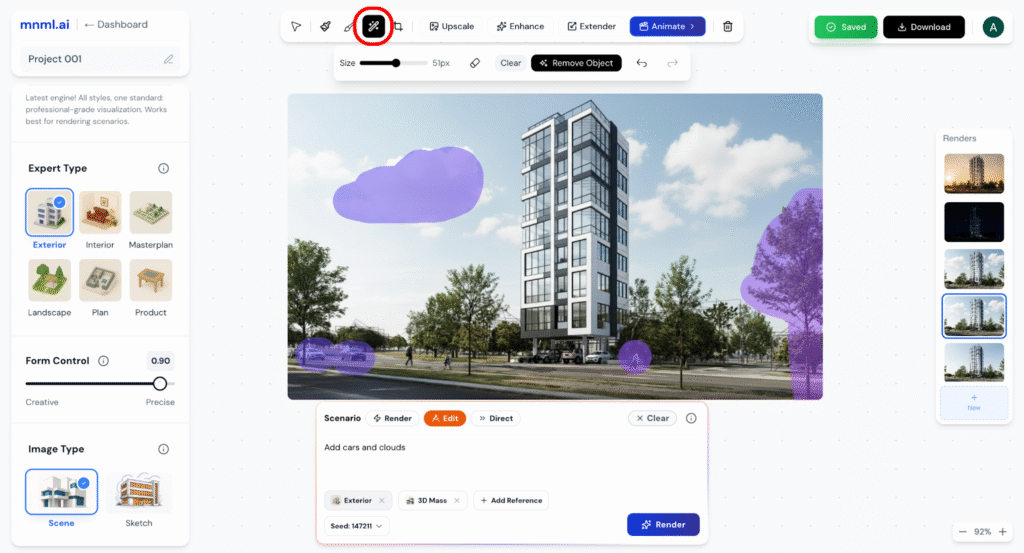
AI Eraser: Intelligently remove unwanted elements.
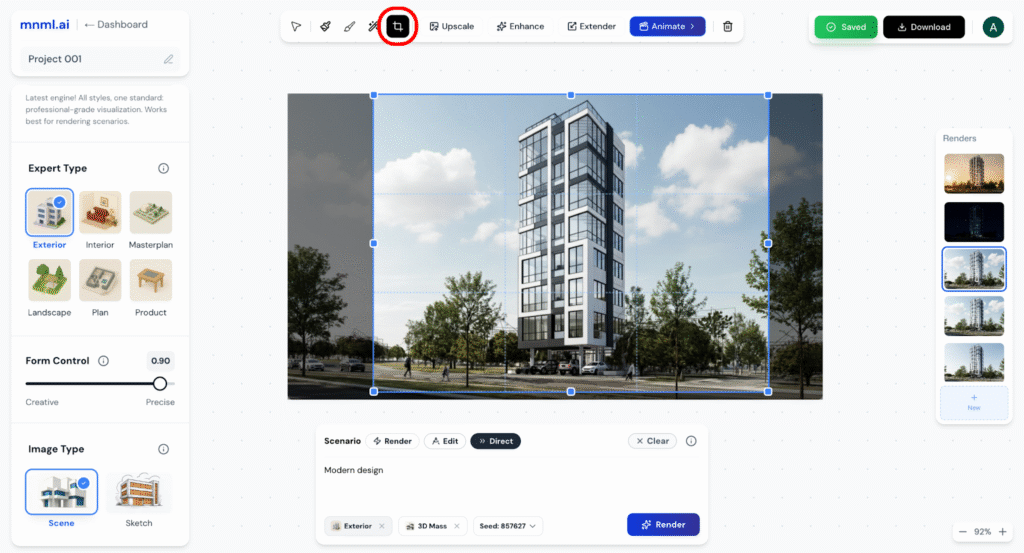
Crop: Trim your image to focus on key areas or remove unwanted parts before rendering.
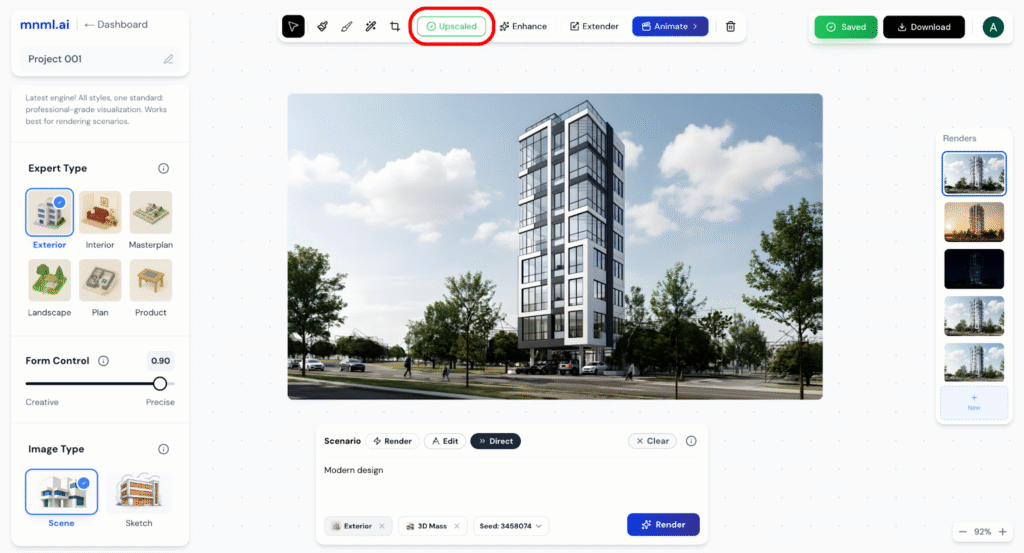
Upscale: Increase image resolution to 4k while maintaining clarity.
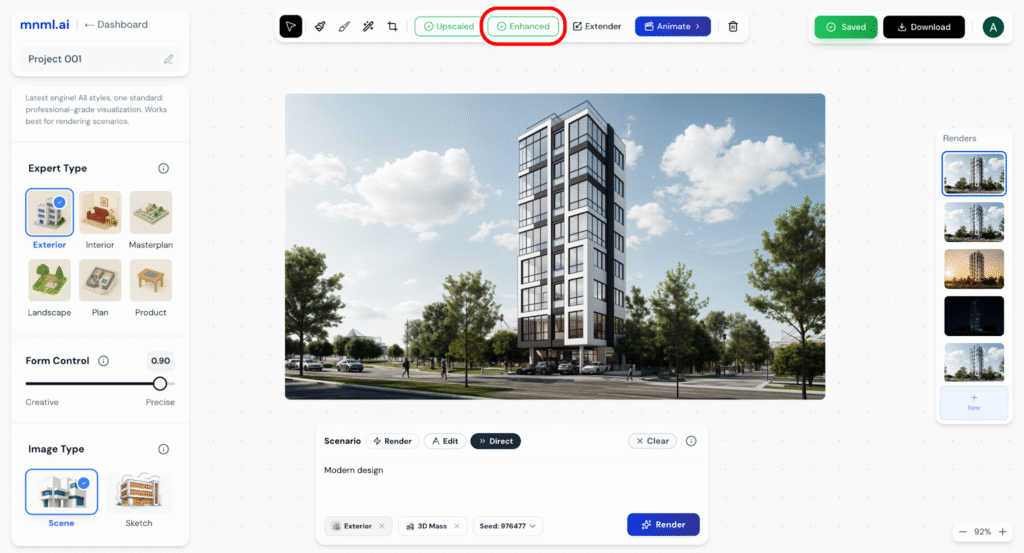
Enhance: Improve sharpness, contrast, and overall image quality.
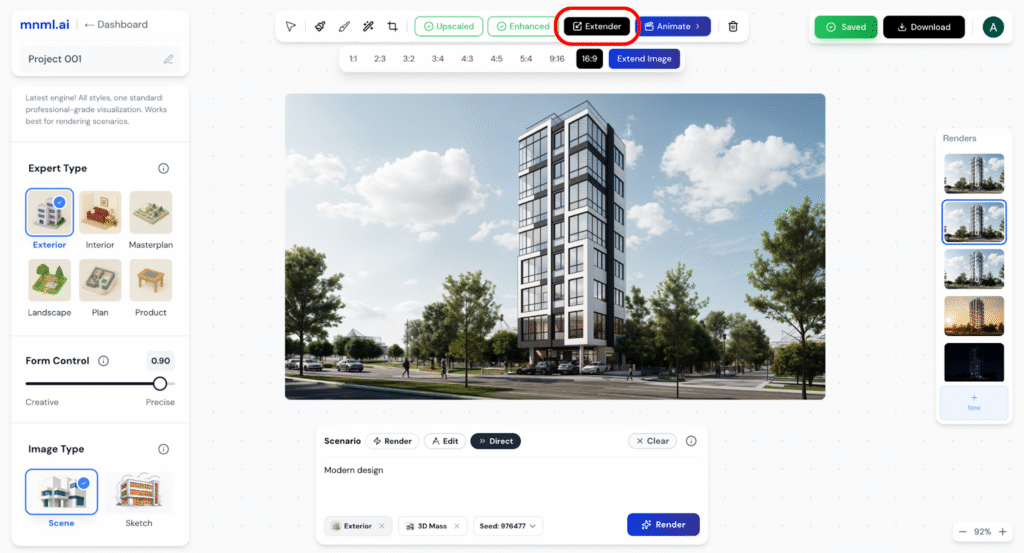
Extender: Expand your image canvas by generating new content around the edges.
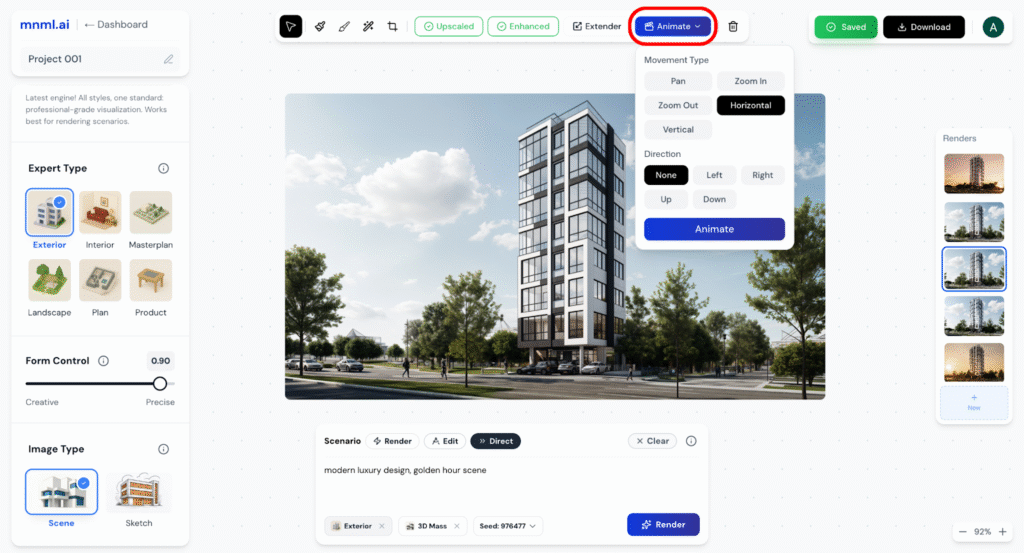
Animate: Create simple motion effects or animated sequences from your still image.
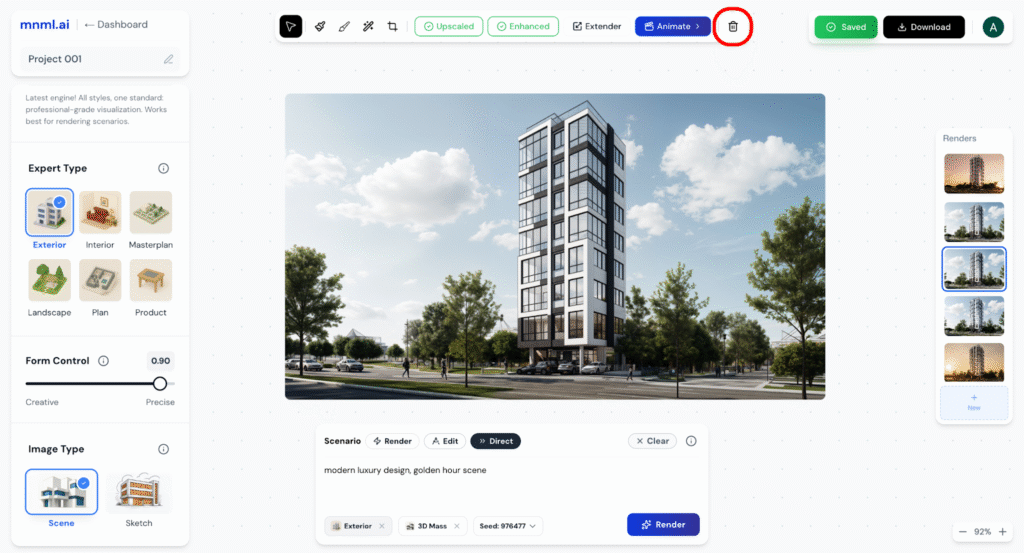
Delete: Remove selected elements or areas with a simple click.
These tools allow you to polish your visuals and iterate quickly without leaving the platform.
Step 9: Layers & New Canvas Options
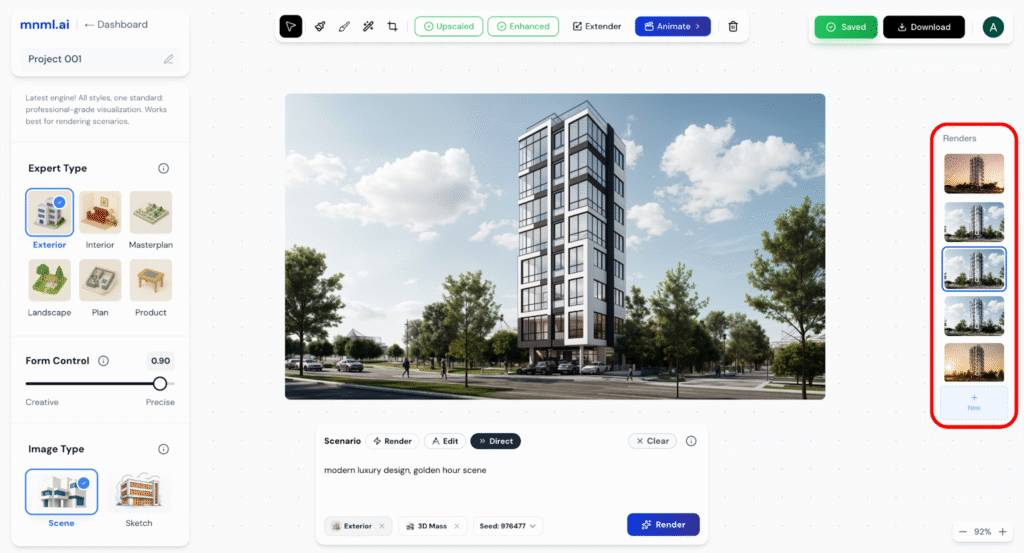
Studio Ai also supports multi-layer workflows and new canvas creation:
Layers Panel: Manage different visual elements individually. Rearrange, hide, or delete layers for precise composition control.
Add New Image: Import additional images into your project to layer visuals or combine elements.
Choose Blank Canvas: Start fresh with a blank canvas to sketch, design, or plan from scratch.
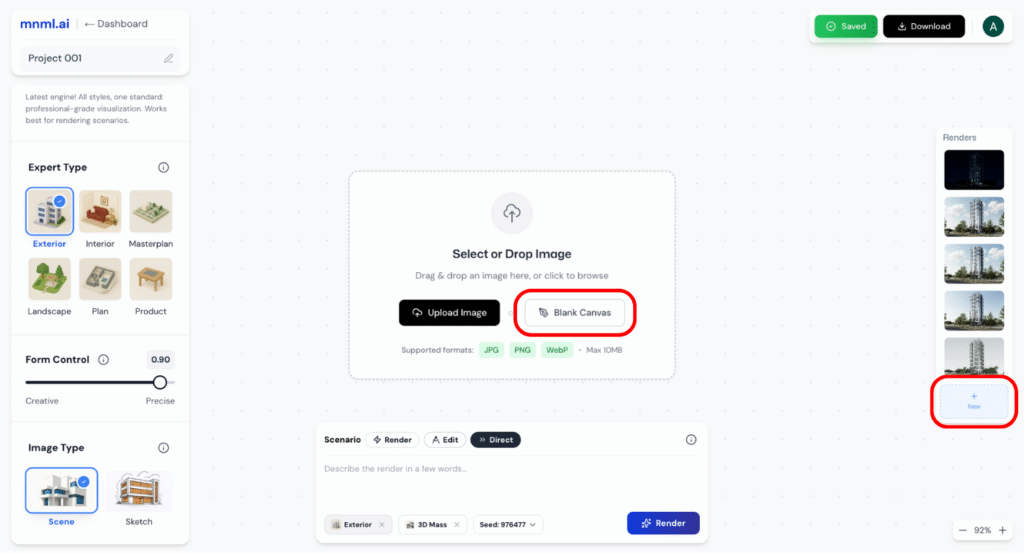
These features are ideal for building complex layouts, design iterations, or custom compositions.
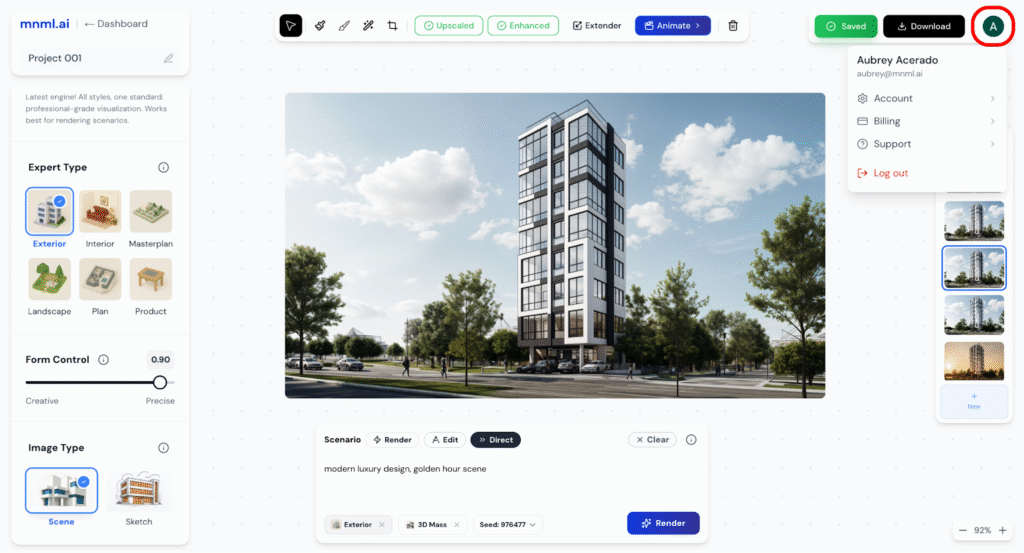
Step 10: Top-Right Controls Overview
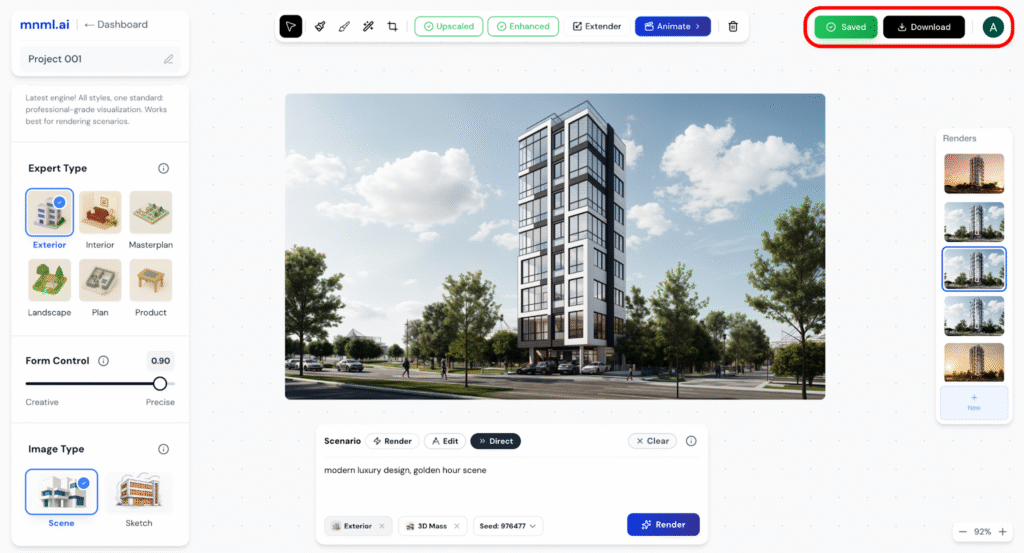
1. Auto Saved (Green Button)
- Indicates that your project is automatically saved in real time.
- You don’t need to manually save—Studio Ai ensures your work is always up to date.
- Helpful for uninterrupted creative flow and version safety.

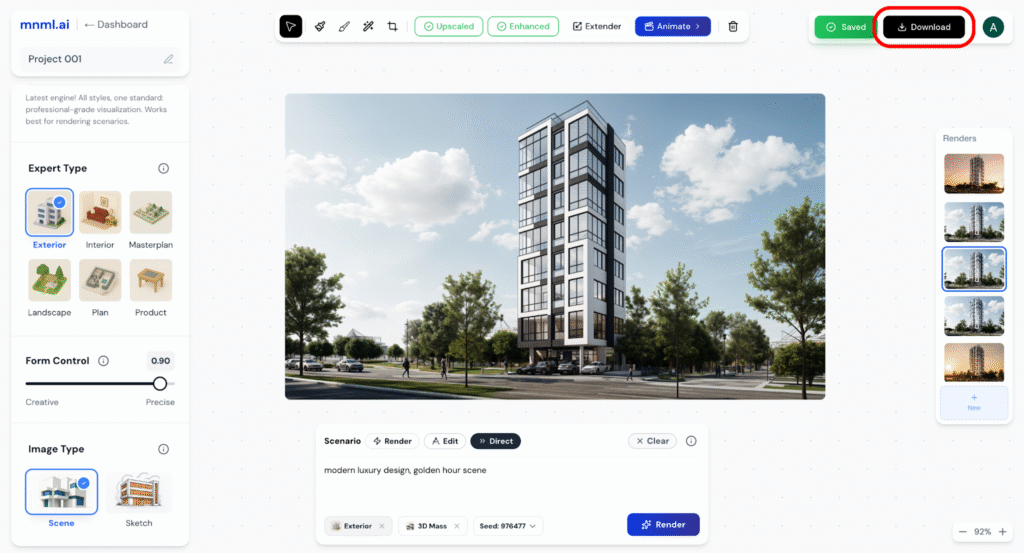
2. Download (Black Button)
- Lets you export your image to your local device.
- Supported file formats may include JPG, PNG, or WebP depending on the settings.
- Ideal for sharing, presenting, or archiving your design.
3. Profile Button (Right-most circle)
- Displays the user’s account initial.
- Clicking opens account-related options: account, billing, support, or log out.