Welcome to Studio Edit Mode! This guide will walk you through the essential tools step by step so you can quickly learn how to select, edit, enhance, and even animate your renders. Each numbered section below introduces one tool with a short explanation and clear instructions.
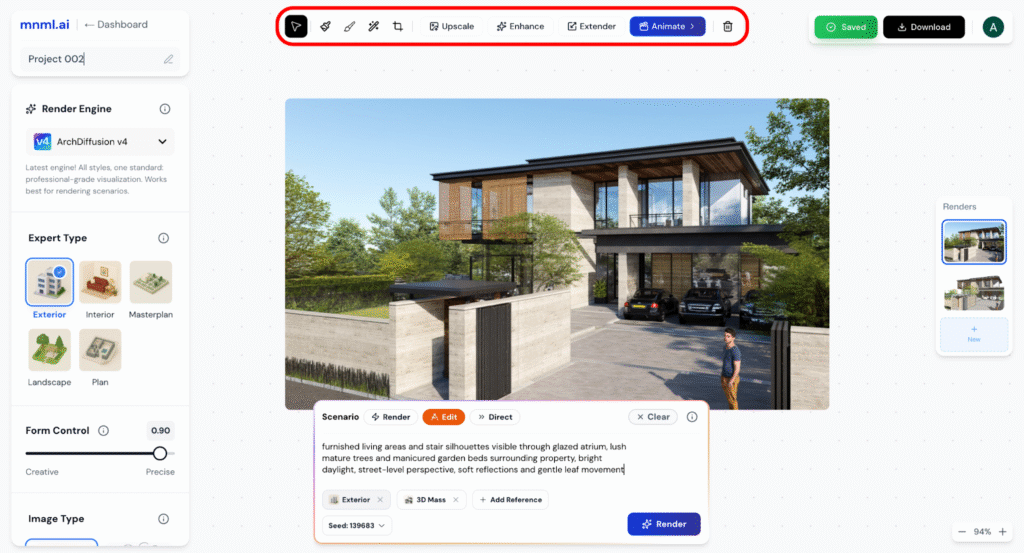
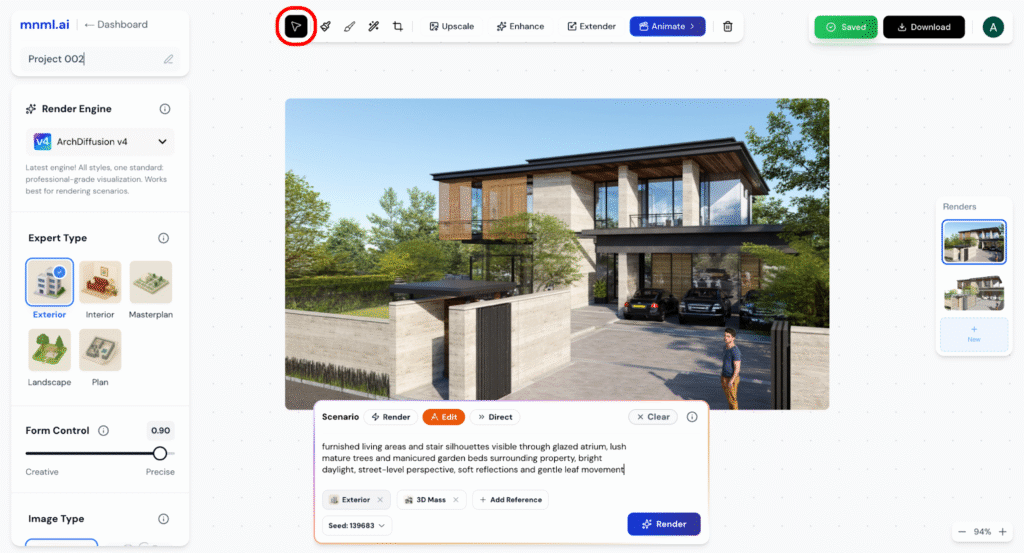
1. Select Tool
Goal: Begin editing by choosing the Select Tool to define the area of the image you want to modify.
Do this:
Drag over the part of your rendered image you want to edit.
Click the Select Tool icon from the toolbar.
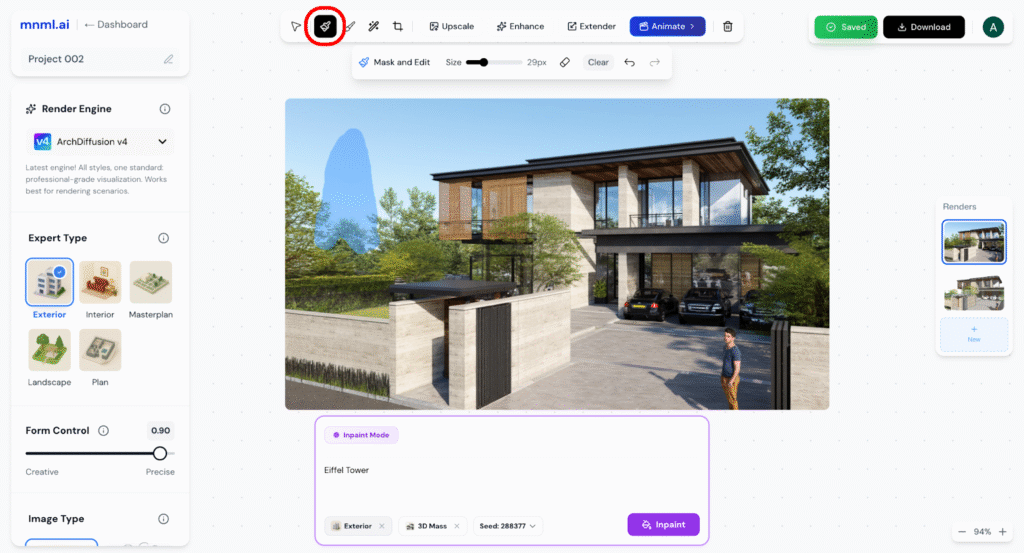
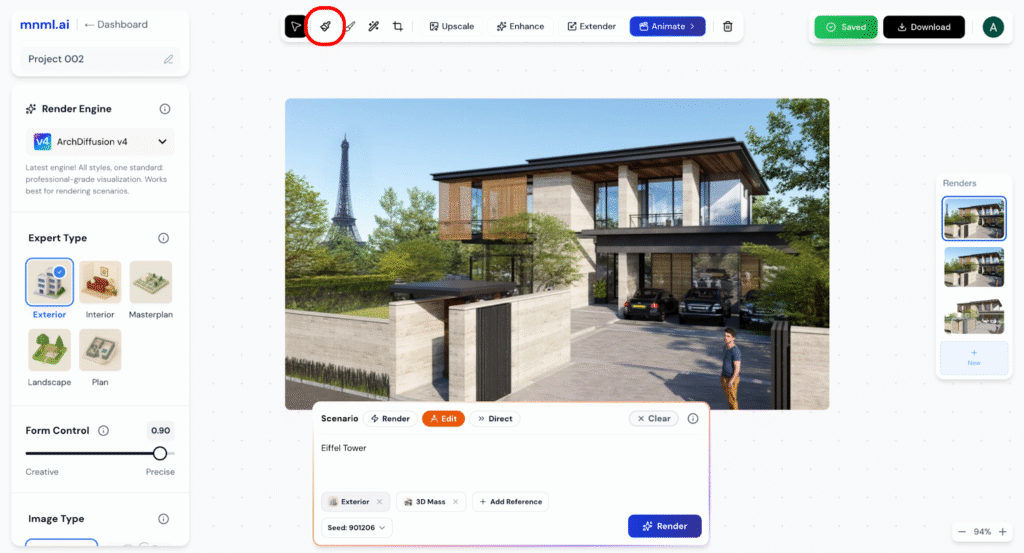
2. Mask and Edit
Goal: Highlight specific areas of your image to adjust or regenerate with precision.
Do this:
Use Clear or the eraser tool if you need to refine your selection.
Select the Mask and Edit brush from the toolbar.
Adjust the brush Size slider (e.g., 20px) depending on the area you want to cover.
Paint over the region you’d like to edit.
Enter a prompt describing the change you want (e.g., “replace this wall with glass”).
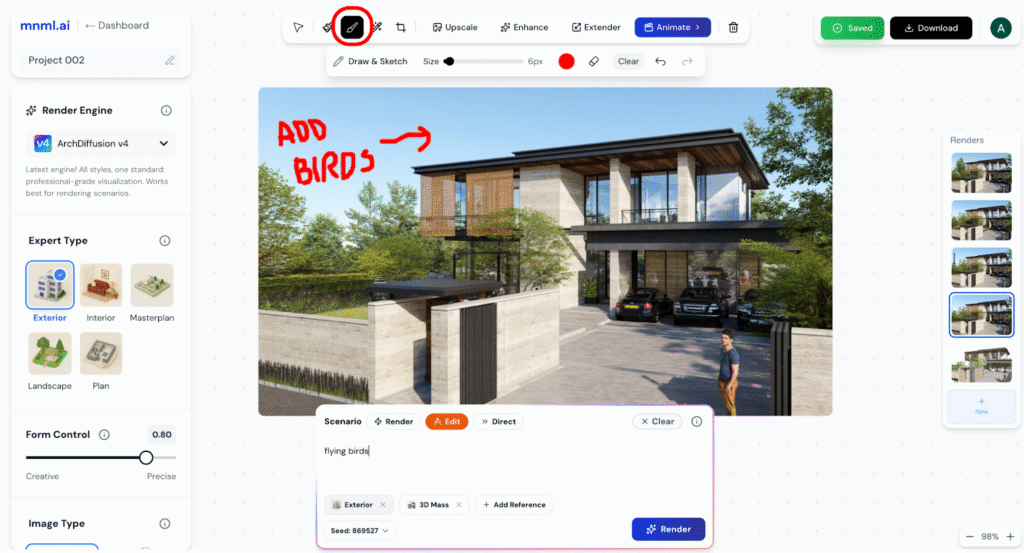
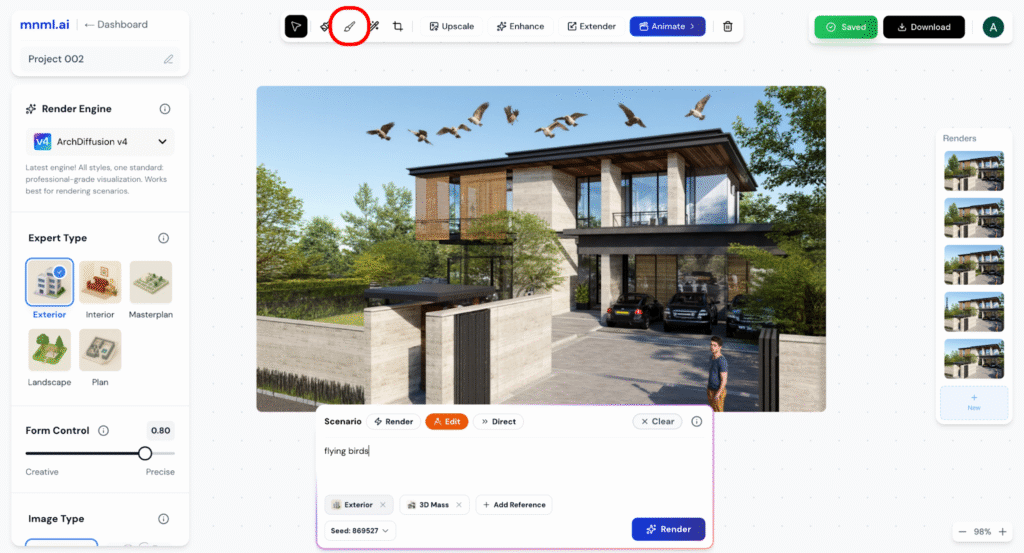
3. Draw
Goal: Add new details or guide edits by drawing directly on the image.
Do this:
Draw directly onto the canvas.
Click the Draw Tool icon from the toolbar.
Adjust the Size slider to control your brush stroke thickness.
Pick a color (e.g., red) for your annotation.
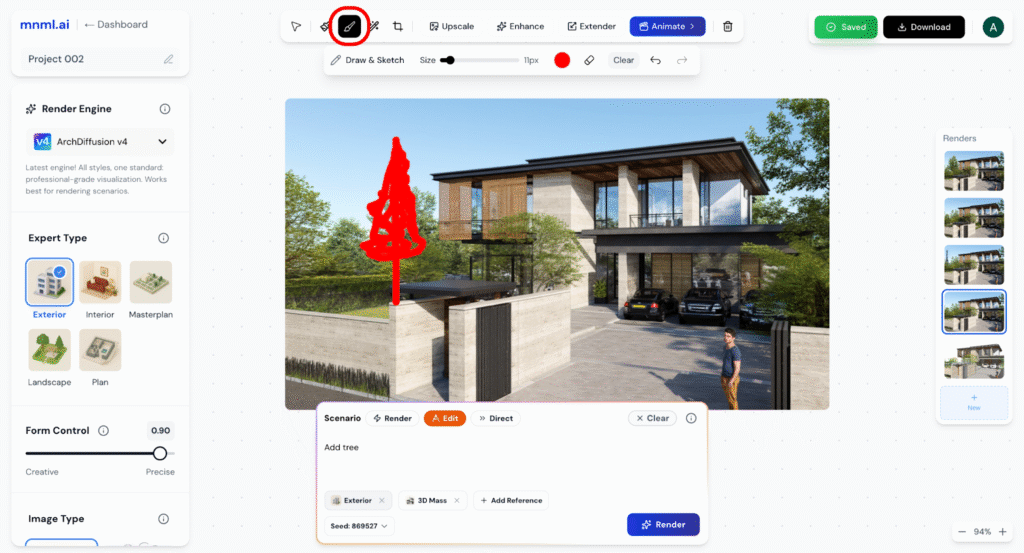
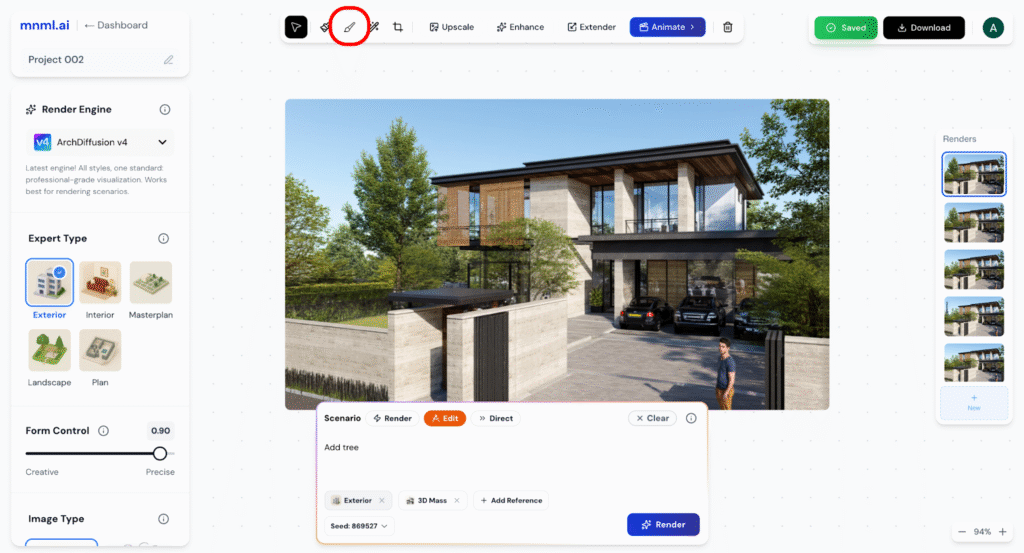
Tip: Use this tool to annotate instructions such as “Add birds”. Studio will interpret your drawing as input and render it into the image accordingly.
4. Erase / Remove Object
Goal: Remove unwanted elements from your render cleanly and seamlessly.
Do this:
Click Remove Object to let Studio regenerate the area naturally.
Select the Erase Tool from the toolbar.
Adjust the Size slider to match the scale of the object you want to remove.
Brush over the object or area you want to erase.


Tip: For best results, use smaller brush sizes for precise areas and larger sizes for broad removals.
5. Crop
Goal: Refine your composition by trimming unwanted edges or focusing on a specific part of your render.
Do this:
Confirm to apply the crop.
Click the Crop button from the toolbar.
Adjust the cropping frame to highlight the area you want to keep.
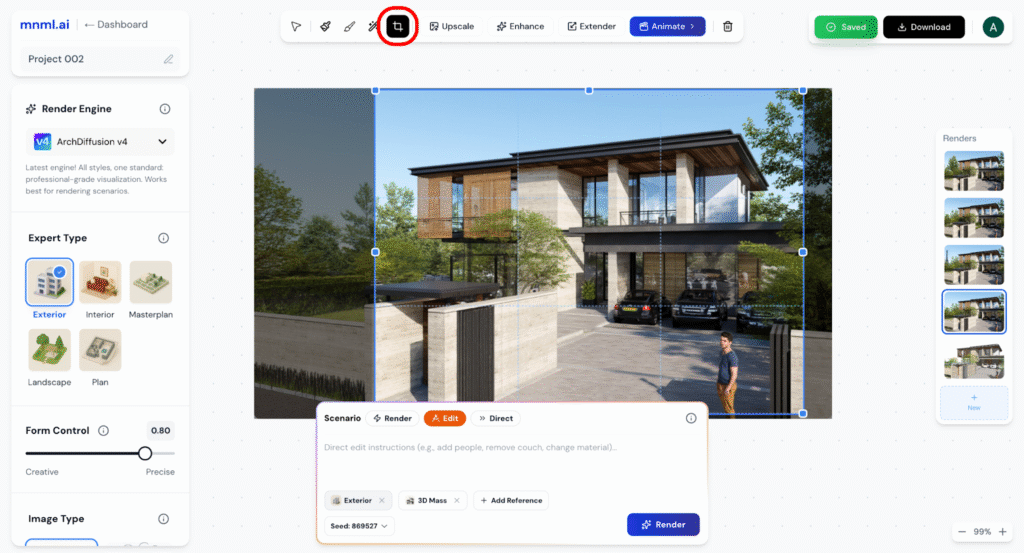
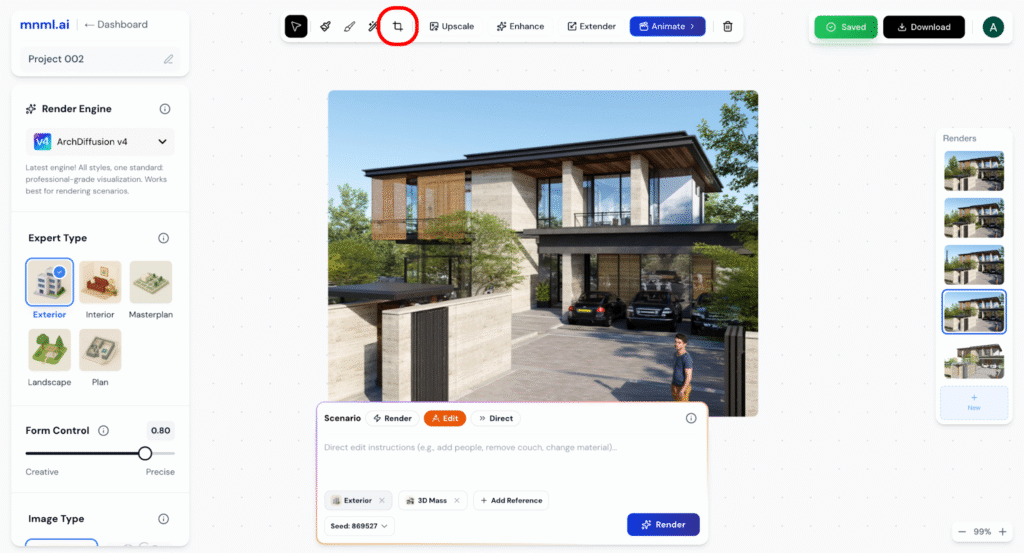
Tip: Cropping is perfect for enhancing framing, removing distractions, or creating multiple variations from a single render.
6. Upscale
Goal: Improve resolution and sharpness by upscaling your render to 4K quality.
Do this:
Wait while Studio processes your render and enhances it to 4K resolution.
Click the Upscale button from the toolbar.

Tip: Upscaling is ideal for final outputs, especially if you need crisp visuals for presentations, portfolios, or large prints.
7. Enhance
Goal: Refine your image with improved clarity, lighting, and detail.
Do this:
Let Studio automatically adjust sharpness, contrast, and fine details.
Click the Enhance button from the toolbar.
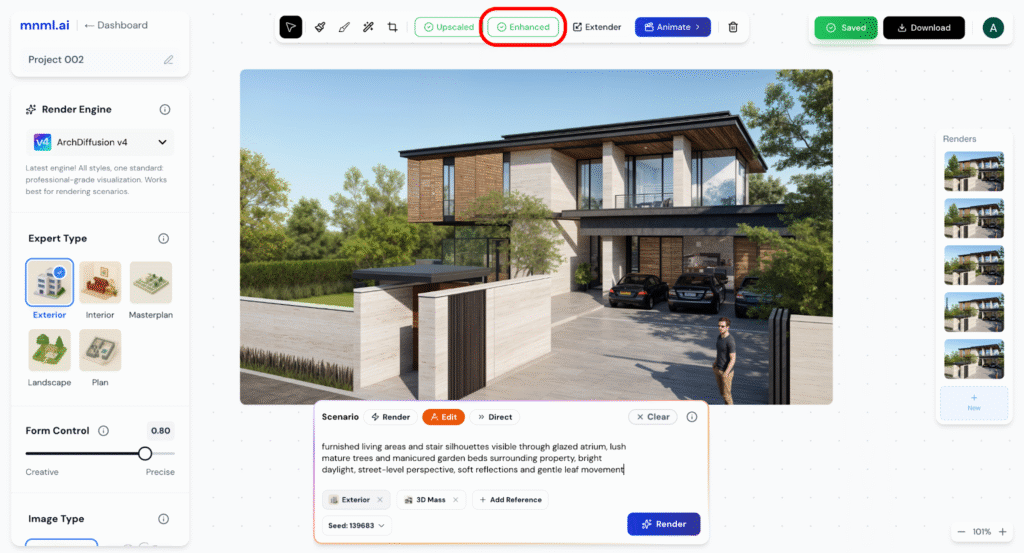
Tip: Use Enhance after masking, drawing, or erasing to give your final render a polished and professional finish.
8. Extender
Goal: Expand your canvas and generate new image areas while keeping the original render consistent.
Do this:
Click Extend Image to let Studio generate the additional space.
Select the Extender button from the toolbar.
Choose an aspect ratio (e.g., 4:3, 16:9, 1:1).
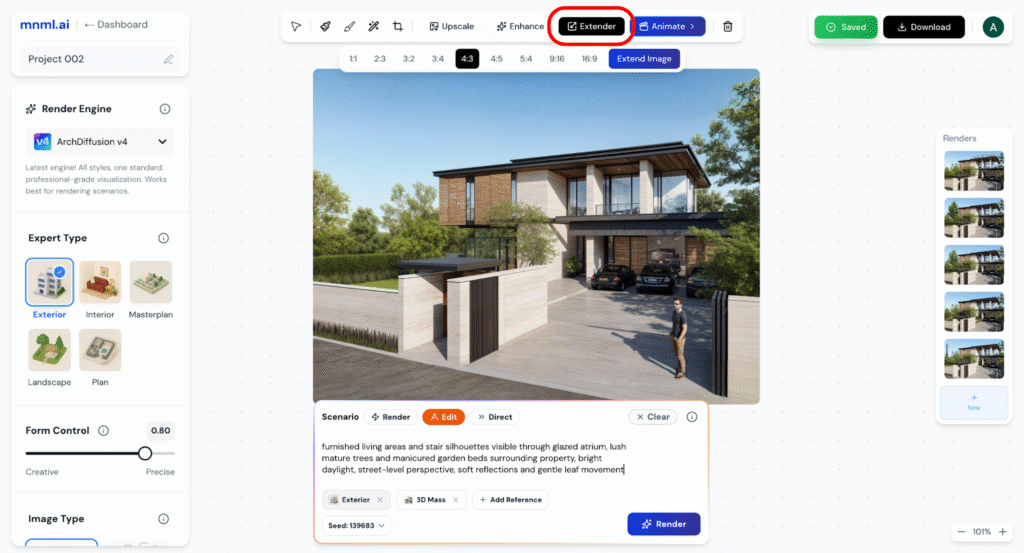
Tip: Extender is perfect for reframing compositions, creating landscape/portrait versions, or adapting renders for different formats like social media or presentations.
9. Animate
Goal: Transform your static design into a short video or animated sequence.
Do this:
Click Render — the video will automatically generate and play once it’s ready.
Click the Animate button from the toolbar.
Enter a prompt describing exactly how you want the animation to look and move.
Example: “Cinematic video animation, camera glides to the left, animate this architectural image.”
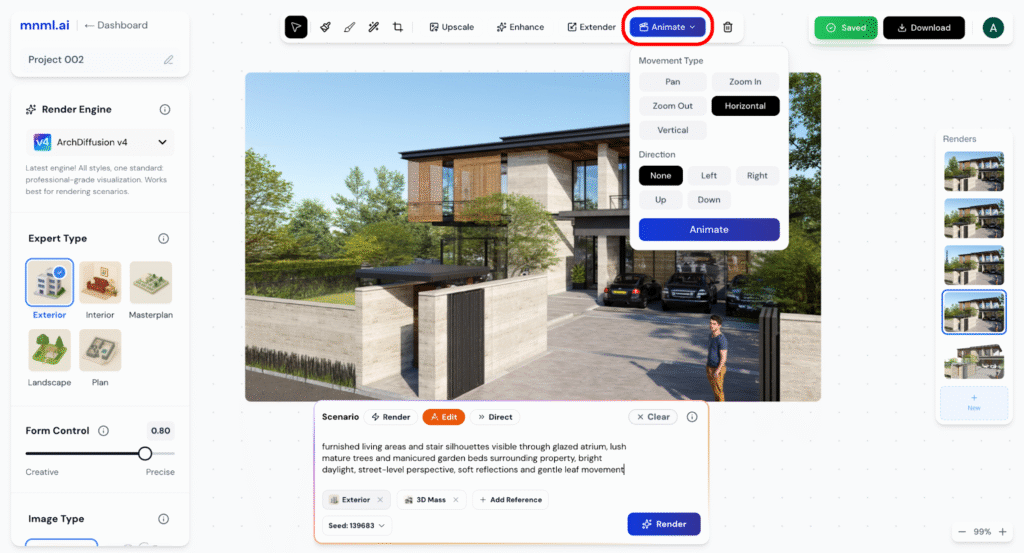
Tip: Everything is controlled by the prompt — from motion direction to cinematic style. The clearer and more detailed your prompt, the better Studio can bring your design to life.
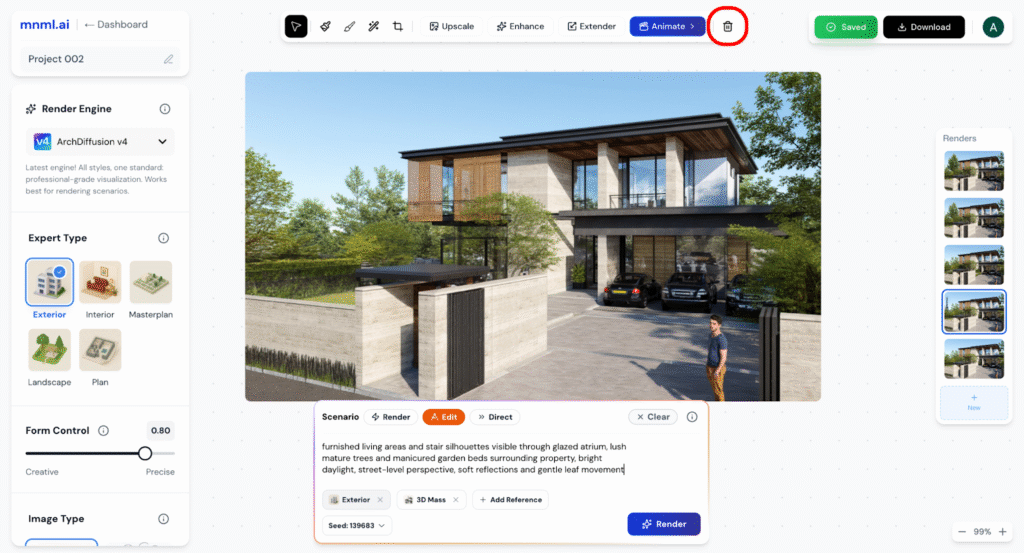
10. Delete
Goal: Remove unwanted layers from your project.
Do this:
Click the Delete (trash bin) icon in the toolbar.
Select the layer you want to remove.
Quick Reference — Edit Mode Tools
Delete — Remove entire layers you don’t need.
Select Tool — Highlight the area you want to work on.
Mask and Edit — Paint over areas, add a prompt, and regenerate.
Draw — Sketch or guide edits directly on the canvas.
Erase — Brush over objects to cleanly remove them.
Crop – Frame and trim to highlight the key area.
Upscale — Boost resolution and detail for final outputs.
Enhance — Sharpen and polish your render automatically.
Extender — Expand canvas size and generate new image areas.
Animate — Use prompts to create dynamic video animations.
Final Thoughts
Edit Mode in Studio gives you everything you need to refine, enhance, and transform your renders — from quick fixes to cinematic animations. Each tool is designed to feel intuitive so you can focus on creativity instead of complexity.